A finished DIY deck costs anywhere from under $1,000 for a small build to well over $5,000 once you factor in lumber, fasteners, and the tool rentals most first-timers forget.
The stage that quietly ruins more projects than any other is site preparation, specifically drainage.
Skip the 1-inch-per-4-feet slope away from your house and you will be pulling up boards in two years to fix rot you could not see coming.
[link-whisper-related-posts]1. Planning and Design
The back corner of my yard stayed muddy until July last year because I never stopped to figure out why.
Sunlight, drainage, the way foot traffic already wore a path through the grass: these things decide whether a deck becomes the room you live in or the platform you regret.
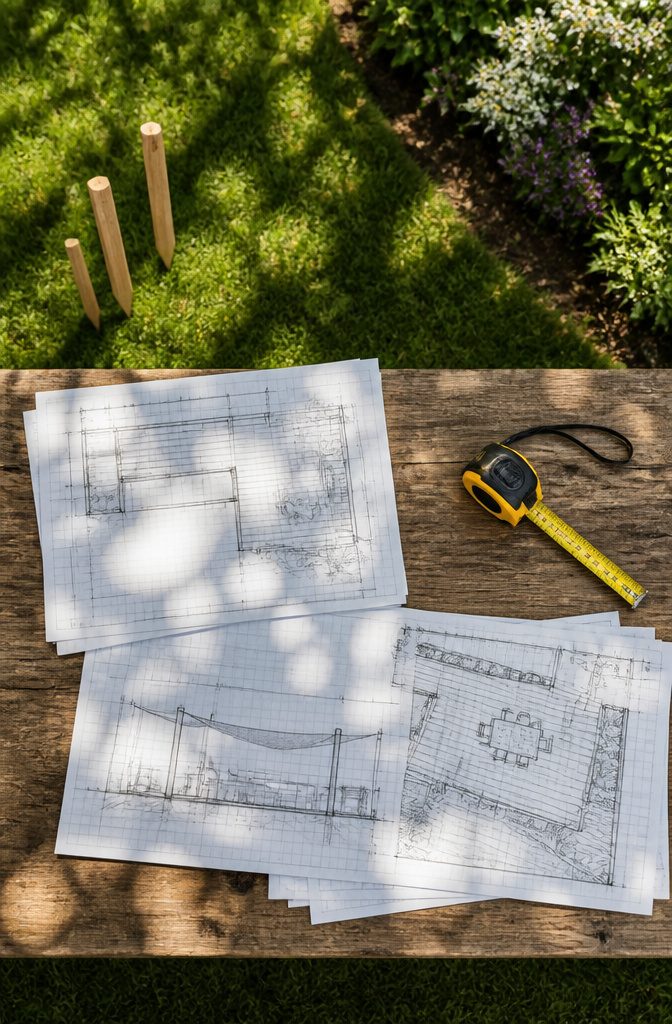
Measure twice with a tape you trust, then sketch what you actually measured, not what you remember.
Purpose shapes everything. A dining table needs a level surface and shade; a grill station wants wind protection and proximity to the kitchen door.
My first sketch put the stairs where they’d dump rainwater onto the patio below. Catching that on paper saved the cost of moving them later, and the cost of fixing the patio.
Draw dimensions to scale, note where the sun hits at 6 p.m., and mark any slope that might need a step-down frame.
A detailed sketch or blueprint serves as your visual reference when you talk to lumber yards or check what’s actually in stock.
Two ways to play the style question: match your home’s existing lines for cohesion, or contrast them deliberately if the architecture is flat and you want some visual weight.
The match is safer; the contrast only works when the deck materials themselves are simple enough to read as intentional rather than accidental.


EXCELLENT MATERIALS: Boshuele Artificial Grass, crafted with cutting-edge UV-resistant yarns, high-quality polyethylene fabric, and a durable latex backing. The grass is 20mm high and the four colors of grass filaments are soft and plump to mimic the color of natural grass, maintaining long-lasting color and form stability.
EXCELLENT MATERIALS: Boshuele Artificial Grass, crafted with cutting-edge UV-resistant yarns, high-quality polyethylene fabric, and a durable latex backing. The grass is 20mm high and the four colors of grass filaments are soft and plump to mimic the color of natural grass, maintaining long-lasting color and form stability.
2. Securing Necessary Permits
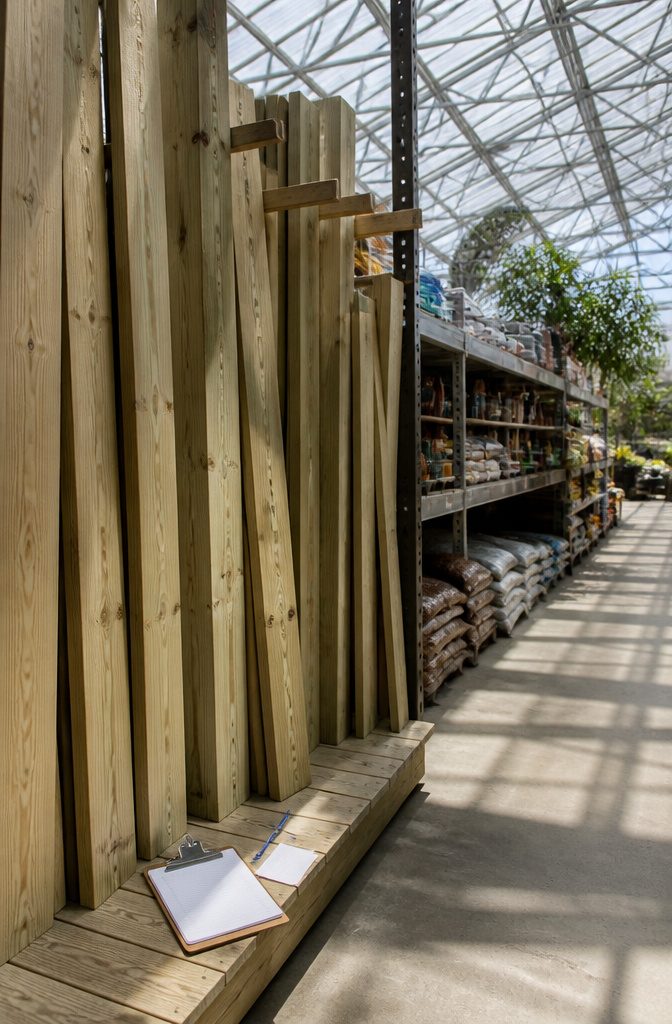
The permit question came up for me the same way it probably does for most weekend builders: standing in the lumber aisle with a cart full of pressure-treated boards, suddenly wondering if the county cares about a deck that’s only a foot off the ground.
Many municipalities let decks under 30 inches high slide without a permit, especially if they are not attached to the house.
That threshold is not universal, though, and the only way to know your local trigger is to call or walk into the building department with your planned dimensions in hand.
Size and attachment status are the usual tripwires. A 10×10 platform in the back corner might clear the bar where a same-size deck bolted to your kitchen door does not.
Setbacks from property lines and overall height restrictions show up in some codes too, and the materials you had in mind may not be the ones your municipality allows.
Skipping the check is a gamble that rarely pays. The permit fee is fixed and known; the fine for building without one, or the cost of tearing down and rebuilding to spec, is not.
Inspectors exist to catch structural failures before they happen, and the compliance they enforce is cheaper than the liability you keep if someone gets hurt on an unpermitted build.

3. Site Preparation
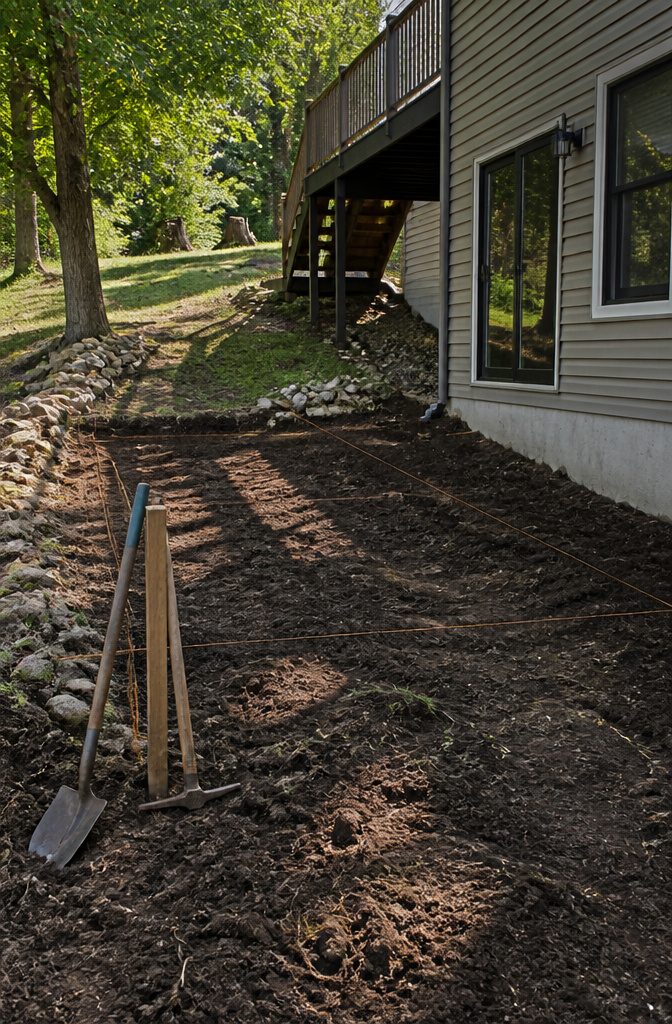
The first thing that hits you when you start clearing a deck site is how much root mass lives just below the grass.
A flat shovel and a mattock get the sod up, but the real work is chasing roots that run wider than the canopy ever suggested.
I learned to cut a root, then follow it until it stops trying to send up shoots. Miss one, and in two years you have a hump in your decking that no amount of staining hides.
Drainage is where weekend projects quietly fail. The soil needs to slope away from the house, roughly 1 inch of drop for every 4 feet of run, so water doesn’t pool against the foundation or sit under the frame.
I check this with a 4-foot level and a scrap of wood, shimming until I can see the bubble read true. No slope means rot you won’t notice until the ledger board lets go.
String lines and stakes outline the footprint, but the step most people skip is calling 811 before the first stake goes in.
Buried utilities run closer to the surface than you’d think, and a gas line strike turns a Saturday project into an evacuation. Mark the layout, confirm the slope, and only then start digging.
Country Of Origin : China

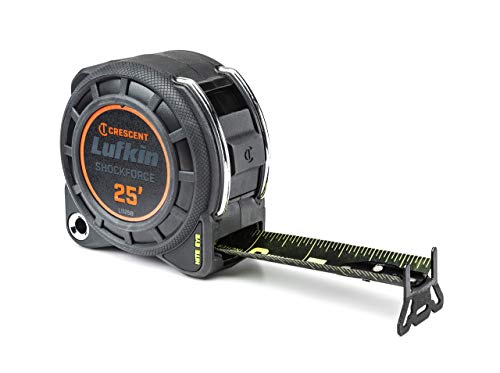
Compact Casing: Features a space-saving design with heavy-duty protective rubber boot for durability and portability on any job site
4. Foundation and Framing Installation
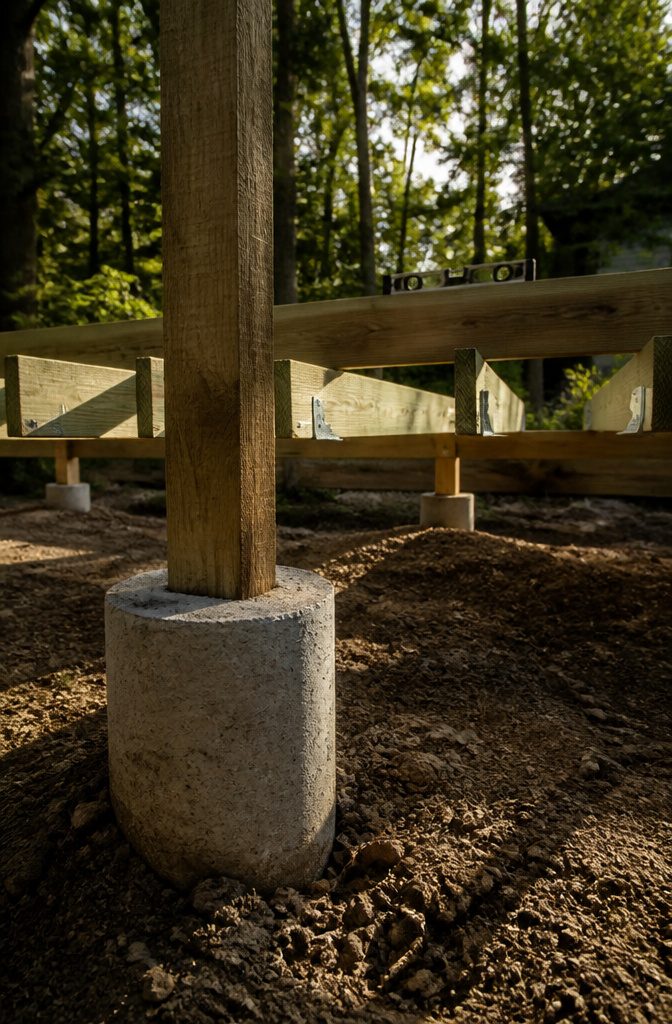
Concrete deck blocks work fine on stable, well-draining soil, but my own preference leans toward treated wood posts set into concrete footings.
The posts are easier to square and adjust as you build, and they handle the lateral stress of a railing better than a block sitting at grade.
Footings need to sit below your local frost line, whatever that number is for your county.
In my area that meant 36 inches, and skipping that depth is the mistake that keeps on giving. A neighbor two doors down set his posts at 24 inches to save a Saturday of digging.
Two winters later the heave had tilted his whole frame enough that doors on the house would not open onto the deck anymore. He ended up pulling the ledger, jacking beams, and re-pouring in March mud.
Beam sizing and post spacing go together. Wider spacing needs a deeper beam, and the lumberyard will size both off a span table if you bring them a sketch.
Joist hangers belong on every connection; toe-nailing alone lets the frame rack over time. I hang the outer joists first, check the box for square with a 3-4-5 triangle on the corners, then fill in between.

HIGH-QUALITY MATERIAL: Our cable railing posts are crafted from stainless steel T304 with great rust resistance and will work for a long lifetime. It is ideal for both indoor and outdoor applications like decks, stairs, porches, balconies, and fences

36" Stair Cable Railing Post: Designed for 36-inch residential cable railing projects, this 2" x 2" stair post measures 35 inches high and reaches approximately 36 inches when paired with a top rail. The 33° angled hole is suitable for stair slopes from approximately 28° to 38°. A 1.35 mm post wall and thickened 4-3/8" x 2-3/4" welded base provide added support for surface-mount installation, while 10 pairs of pre-drilled holes simplify cable routing along stair sections.
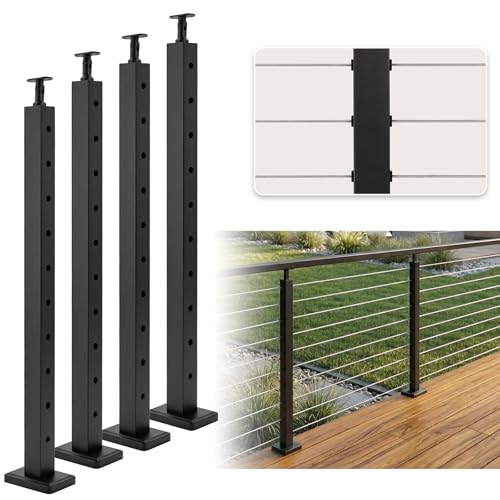
Modern Cable Railing Design:This cable railing post features a clean square profile with a matte black finish, creating a modern railing appearance suitable for decks, balconies, and stair railing layouts
5. Decking Installation
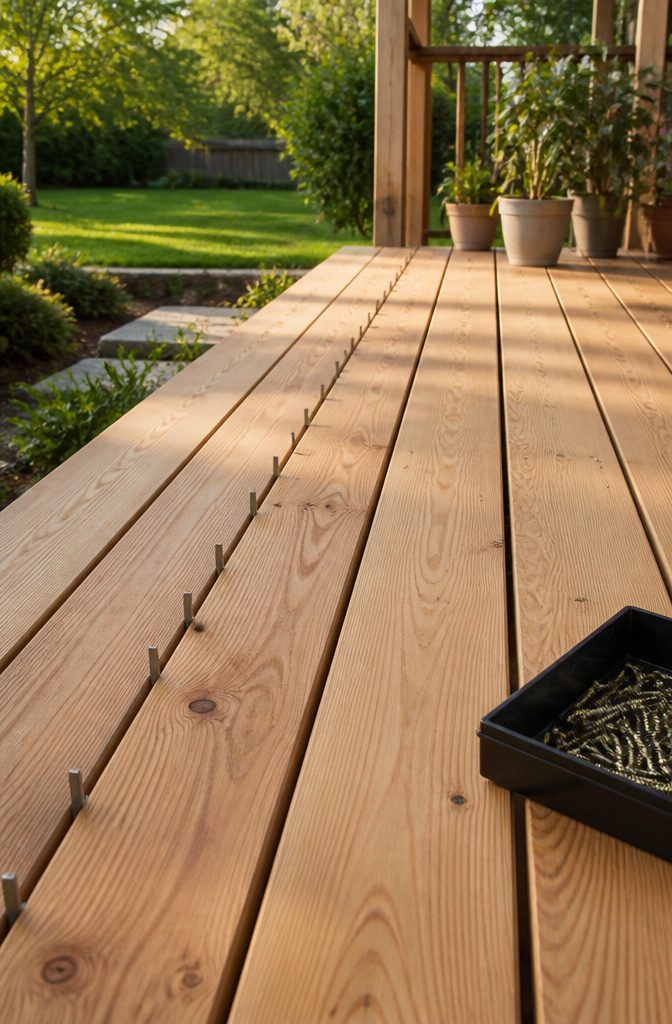
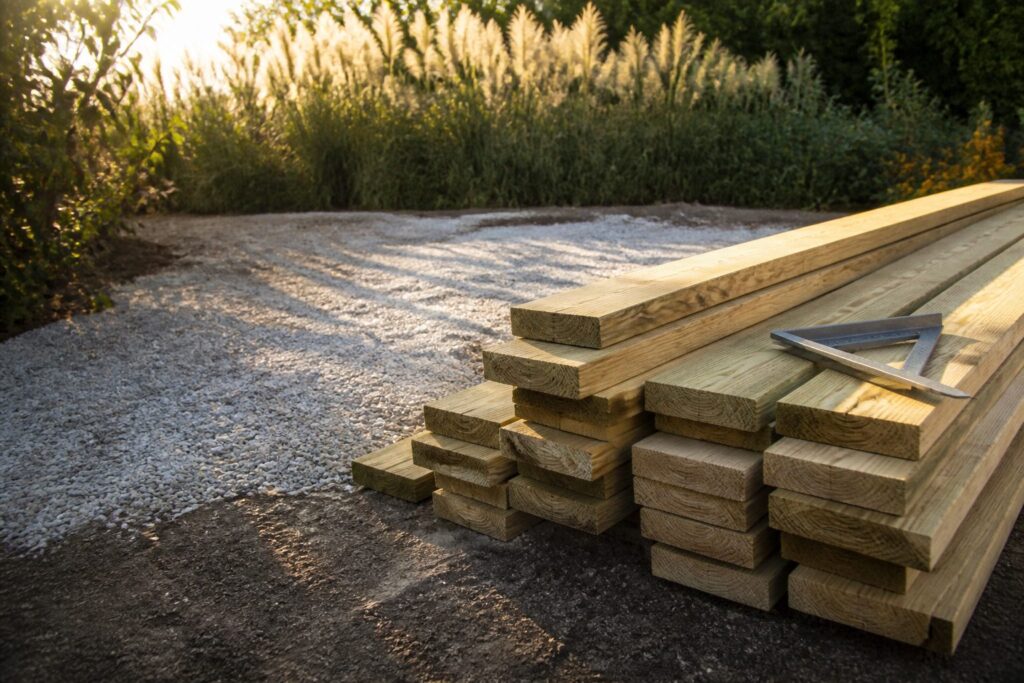
Pressure-treated lumber, cedar, or composite boards run perpendicular to the joists, and the gap between them is what keeps rainwater from pooling.
I use a 16d nail as a spacer, slipping it between boards as I work to keep the gap consistent.
Too tight and the boards trap water; too tight and you hear the crack of wood splitting when summer humidity swells them against each other. That sound means pulling boards back up.
Galvanized or stainless-steel screws are the only ones worth buying for this. Standard fasteners rust out in a few seasons, and the corrosion works its way into the board from the hole outward.
Hidden fasteners keep the surface clean, but face fasteners with color-matched heads are faster to install and easier to replace a single board later.
For a weekend build on a real budget, the 16d nail gauge and corrosion-resistant screws are where the money goes, not into specialty clips you’ll never find at the local yard.

Use exclusively with CAMO Edge hidden deck screws deck fastening system

Superior Outdoor Performance: Our construction screws are engineered for outdoor durability, making them ideal for decking projects; the epoxy coating offers corrosion resistance, ensuring long-lasting use for all wood deck screws applications

Dual-Layer Corrosion Defense: Featuring a robust combination of epoxy coatings, these screws offer superior rust protection making them perfect for pressure-treated wood and harsh outdoor decking environments.
6. Final Checks and Maintenance
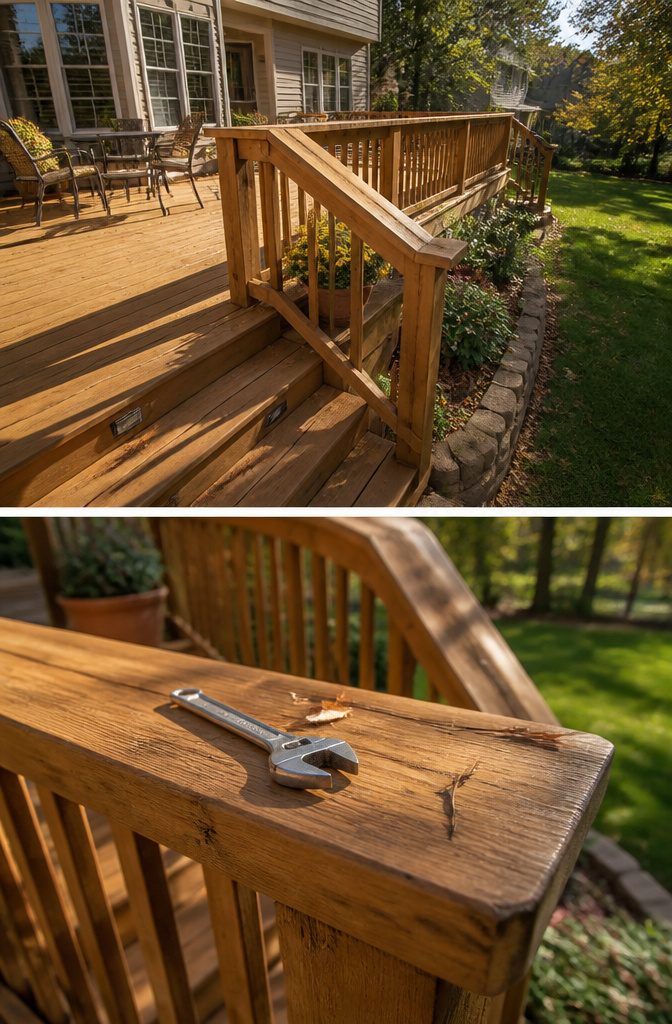
The spring after I finished my deck, I skipped the seasonal inspection.
Rain had pooled where the ledger met the house, and by March I had soft spots spreading along two joists and a railing that wobbled when my shoulder brushed it carrying groceries.
The repair cost a weekend and about $80 in lumber, which is the price of learning that resealing every 2–3 years is not a suggestion.
Now I check connections before and after winter, running a wrench over bolts and watching for boards that shift underfoot.
Drainage matters as much as the build itself: leaves packed against the rim trap moisture underneath, so a broom or leaf blower every few weeks keeps ventilation open.
Composite decking skips the sanding and sealing cycle entirely, needing only an annual wash to clear mildew from shaded areas.
Wood demands more: twice-yearly cleaning, and that 2–3 year resealing to block UV and rot. I mark the calendar now.
EXCELLENT MATERIALS: Boshuele Artificial Grass, crafted with cutting-edge UV-resistant yarns, high-quality polyethylene fabric, and a durable latex backing. The grass is 20mm high and the four colors of grass filaments are soft and plump to mimic the color of natural grass, maintaining long-lasting color and form stability.
EXCELLENT MATERIALS: Boshuele Artificial Grass, crafted with cutting-edge UV-resistant yarns, high-quality polyethylene fabric, and a durable latex backing. The grass is 20mm high and the four colors of grass filaments are soft and plump to mimic the color of natural grass, maintaining long-lasting color and form stability.
EXCELLENT MATERIALS: Boshuele Artificial Grass, crafted with cutting-edge UV-resistant yarns, high-quality polyethylene fabric, and a durable latex backing. The grass is 20mm high and the four colors of grass filaments are soft and plump to mimic the color of natural grass, maintaining long-lasting color and form stability.
Materials Comparison
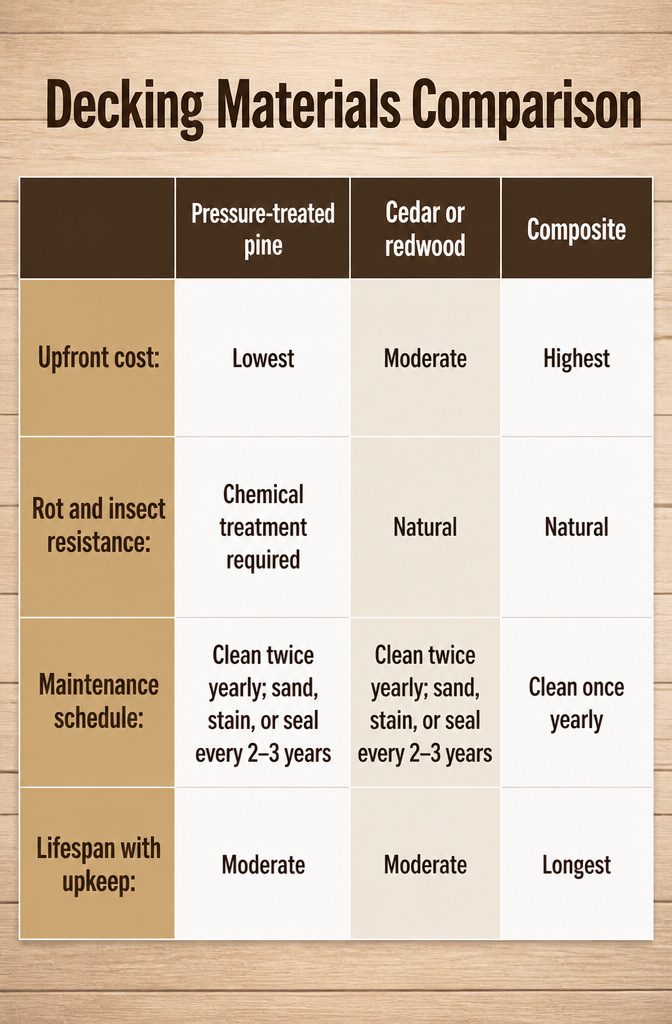
Pressure-treated pine is the default for a reason: it is affordable and stocked at every lumberyard in the country.
Cedar or redwood costs more upfront but resists rot and insects without chemical treatment, which matters if you are building near soil or in a damp climate.
Composite decking runs highest at the register and saves its value later, since it never needs sanding, staining, or sealing. For a weekend build with a few hundred dollars, that tradeoff is the whole decision.
| Pressure-treated pine | Cedar or redwood | Composite | |
|---|---|---|---|
| Upfront cost | Lowest | Moderate | Highest |
| Rot and insect resistance | Chemical treatment required | Natural | Natural |
| Maintenance schedule | Clean twice yearly; sand, stain, or seal every 2–3 years | Clean twice yearly; sand, stain, or seal every 2–3 years | Clean once yearly |
| Lifespan with upkeep | Moderate | Moderate | Longest |
If the deck is temporary or you are testing whether you will actually use the space, pressure-treated pine is the right call. Cedar or redwood makes sense when the finished look matters and you are willing to maintain it.
Composite pays off only if you are staying put long enough to skip three or four staining cycles, which is rarely the math on a first home or a rental.
Safety Considerations
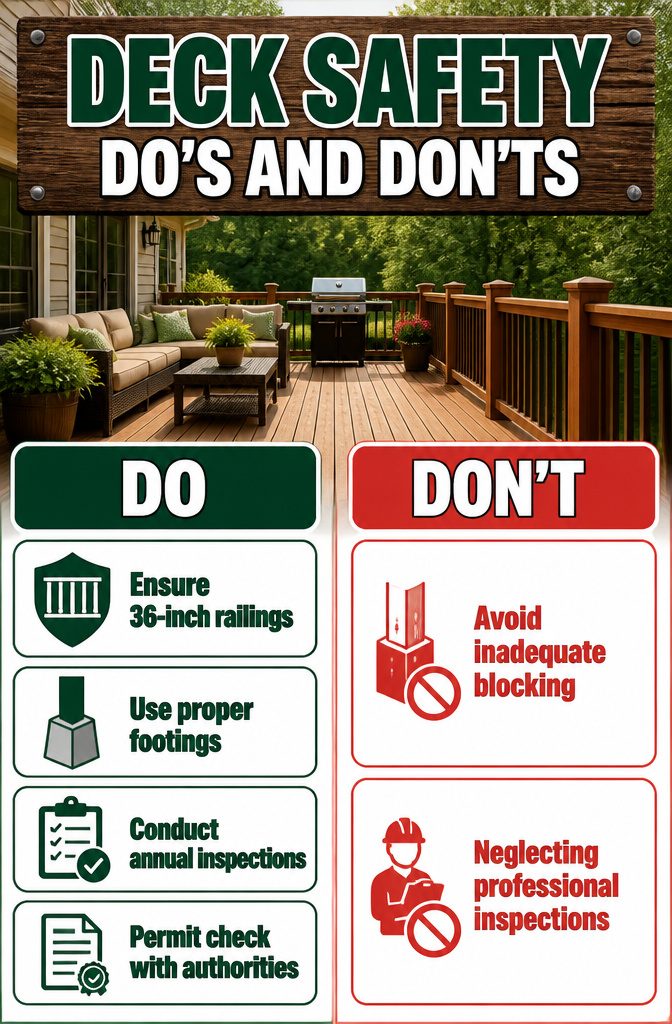
A deck loaded with people, furniture, and a running grill can push past 100 pounds per square foot, which is why 36-inch railings are not a suggestion but the minimum most codes enforce.
A ledger board’s weight alone makes the point: footings have to be right. Frost heave or a shallow pier turns that wobble into a collapse three winters later.
Handrails feel like finish carpentry, but they are structural. The posts need blocking behind the rim joist, not just screws into end grain.
Local building departments vary on whether a freestanding deck under 30 inches needs a permit at all, yet every municipality I have checked still wants railings once you are 30 inches off grade.
Calling before the first hole saves the cost of tearing back out.
Annual inspection is where the real safety work happens. Loose boards announce themselves with a different pitch underfoot, and rust blooms around nails long before rot shows on the surface.
Some sources say professional inspections every few years; others say a homeowner with a pry bar and a flashlight catches most failures.
My own leaning is toward the pro every third year, after watching a sistered joist I thought was solid turn out to be sponge behind a fresh coat of stain.

ULTIMATE DURABILITY - Built with heavy-duty ABS plastic housing and steel tape measure blade to withstand tough jobsite drops, bumps, and daily wear for long-lasting precision in any construction or DIY project.

Center brake to hold blade

Up to 20% more compact, military-grade housing
Cost and Budget
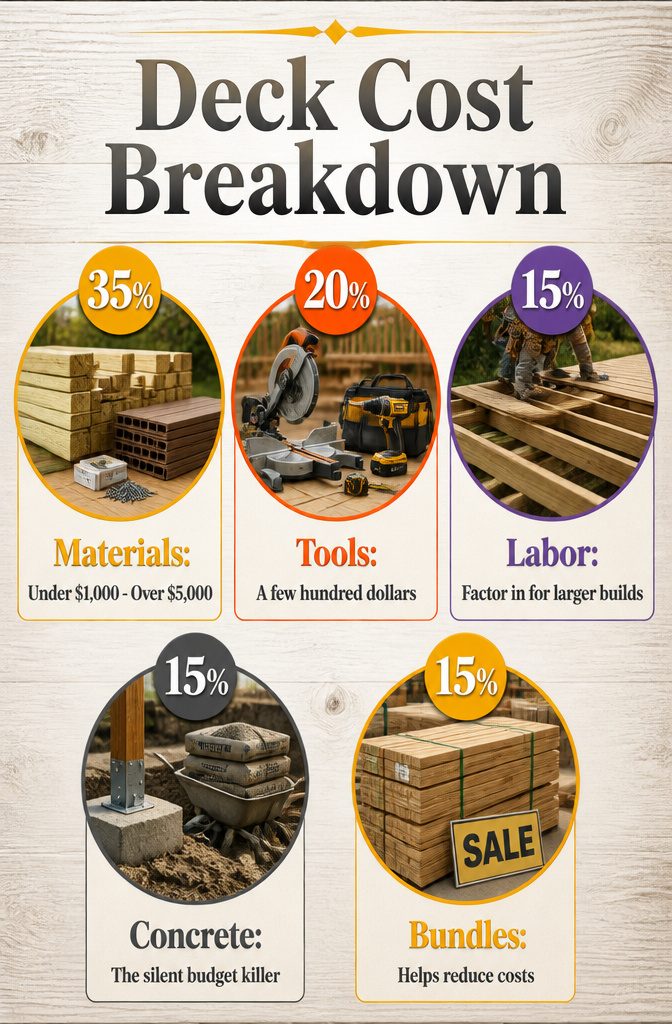
A small DIY deck might run under $1,000, while larger builds easily exceed $5,000. The gap comes down to lumber, fasteners, concrete, and the rental tools most first-timers forget to budget for.
Pressure-treated lumber still dominates the low end, though cedar or redwood will push material costs higher for that natural look. Composite decking runs more upfront but saves the weekend maintenance of sealing and staining later.
Either way, the fasteners add up faster than expected: hidden clip systems for composite, coated structural screws for wood, plus the joist hangers and post bases the code requires.
Concrete is the silent budget killer. A 12-foot deck needs more bags than you want to carry, or a mixer rental if you value your back.
Add the auger for post holes, a miter saw if you do not own one, and suddenly the tool line item hits a few hundred dollars before you cut a single board.
Buying materials in bundles or during sales can help reduce overall costs. The real savings, though, come from sizing the deck to actual lumber lengths rather than leaving half a board as scrap on every run.


𝐁𝐮𝐢𝐥𝐭 𝐰𝐢𝐭𝐡 𝐀𝐥𝐥 𝐀𝐥𝐮𝐦𝐢𝐧𝐮𝐦—𝐅𝐨𝐫 𝟑𝟎+ 𝐘𝐞𝐚𝐫𝐬 𝐎𝐮𝐭𝐝𝐨𝐨𝐫𝐬: FOR EASY CUT. FOR LASTING PEACE OF MIND. 𝐅𝐈𝐍𝐈𝐒𝐇𝐄𝐃 𝐖𝐈𝐓𝐇 𝐀𝐍 𝐀𝐀𝐌𝐀 𝟐𝟔𝟎𝟒 𝐏𝐎𝐖𝐃𝐄𝐑 𝐂𝐎𝐀𝐓—FOR WEATHER, RUST, AND FADE RESISTANCE. FOR LOWER MAINTENANCE AND REPLACEMENT COSTS. FOR REFINED OUTDOOR LIVING. Our durable deck railing from posts and panels to brackets and support rod are all made of real 6063 aluminum. Every detail reflects our commitment to quality. In comparison, 201 stainless steel may corrode within 2–5 years, while exposed iron or steel may rust within 0.5–2 years. Severe corrosion can weaken the structure. For long-term outdoor use, material matters,choose all aluminum.
Deck Design Ideas
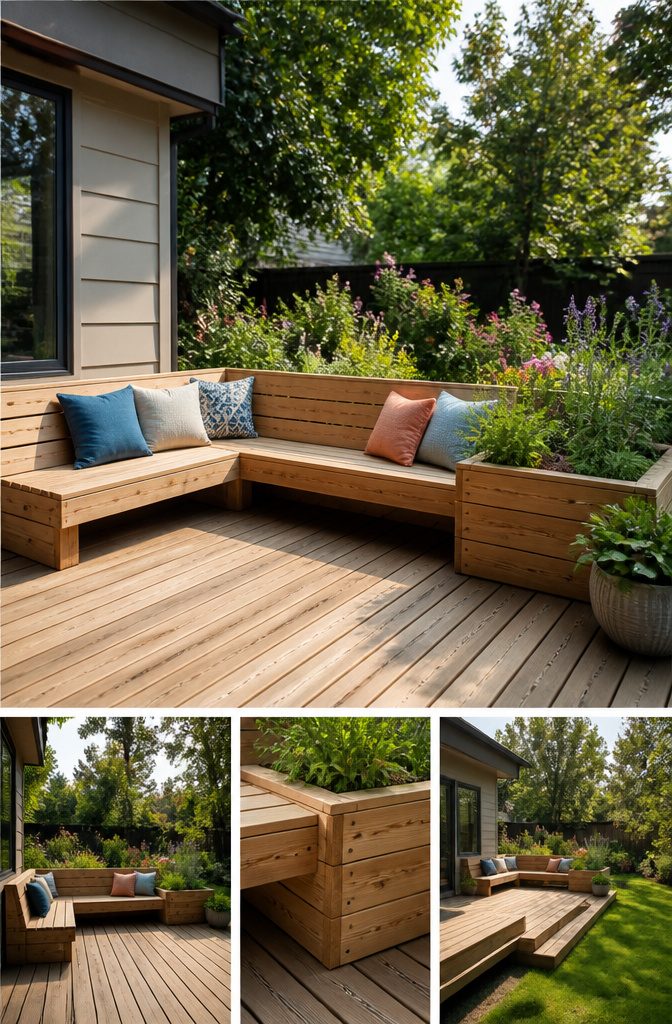
Built-in seating eats up less floor space than dragging chairs out every summer, and a simple L-shaped bench along two rails costs maybe $80 in 2x4s and a weekend.
Leave a 1/2-inch gap between the seat slats so rainwater drains instead of pooling.
- Planters built from the same decking boards hide the rail ends and break up a long rectangle into zones; a row of three 16-inch boxes along the outer edge cost me about $45 in cedar and screws, and the herbs actually survived last August.
- Multi-level decks sound ambitious, but a single 8-inch drop from a dining area down to a lounge zone needs nothing fancier than a few extra posts and one more joist height; solar-powered step lights along that edge run about $12 each and keep the whole thing usable after dark.
- A lower tier also solves the grilling problem: the heat and smoke sit below where people actually sit, and standard 36-inch guardrails still clear the flames by plenty.

Self-Drilling Point: Together, coarse screw threads and a self-drilling point design eliminate the need for a pilot hole

Skip Pilot Holes & Work Faster- FAST-START CUT TIP FOR EFFICIENT INSTALLATION – The sharp notched point helps this #14 carbon steel structural wood screw bite quickly into lumber, reducing drilling in many softwoods. Aggressive threads pull the fastener into wood for secure assembly of posts, beams, landscape timbers, fences, barns and pergolas. Dense hardwood, end-grain work or positions near board edges may still require a correctly sized pilot hole to reduce splitting and excessive driving torque.
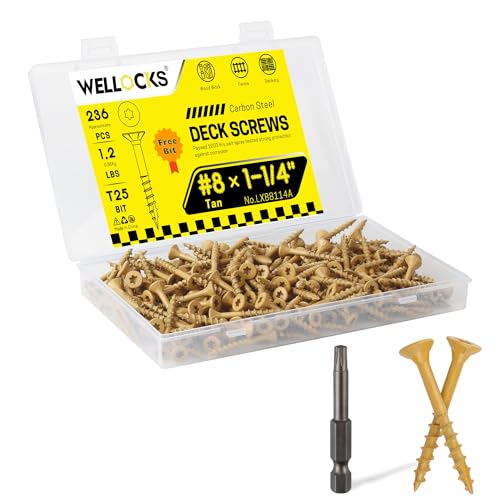
【Above 1000Hrs Salt Spray Test】Specifically designed to work best with either pressure-treated lumber or composite decking. Adopt premium carbon steel with high hardness coating against rust and corrosion. Our deck screws have passed about 1000 hours salt spray test provide exceptional protection against corrosion.
Environmental Considerations
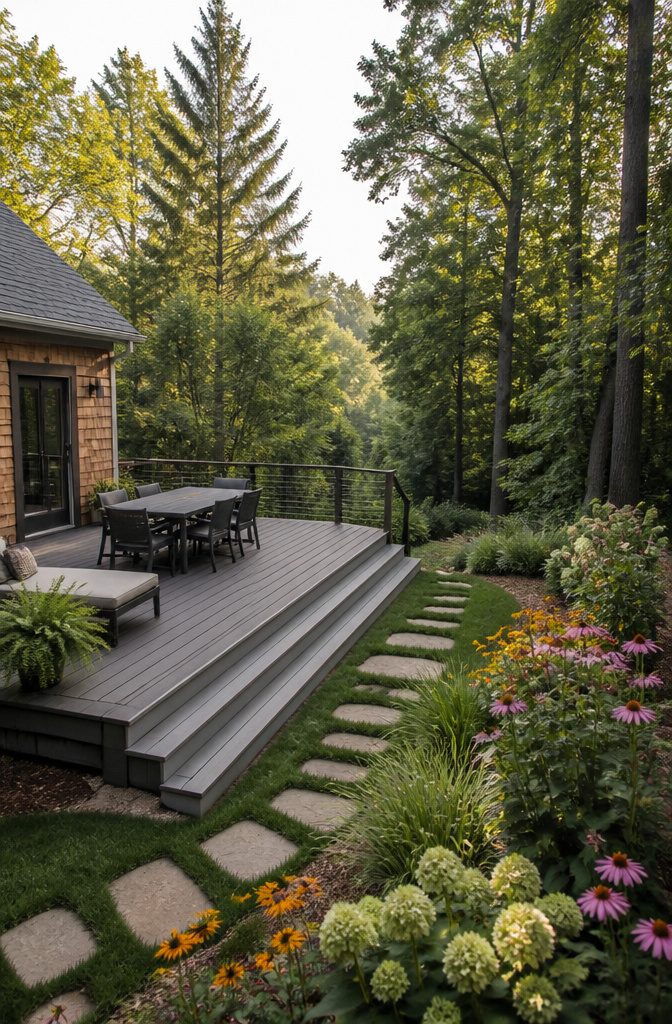
The climate you build in decides whether your deck lasts fifteen years or five. Pressure-treated lumber rots fast in humid coastal air unless you reseal every 2–3 years, while aluminum framing shrugs off that same moisture with zero maintenance.
Termite zones make composite worth the upfront cost: the wood-plastic mix is naturally pest-resistant, and you skip the twice-annual inspections that untreated decks demand.
Sun exposure is the factor most people underestimate.
I did. UV-blocking stain or sealer goes on every 1–2 years on wood, not the 3–4 I once tried to stretch it to; the graying and surface cracking start well before you notice them.
Light-colored stains reflect heat better than dark ones, which matters if bare feet will be on the boards.
Snow load shapes your joist spacing and beam sizing more than most building guides admit, and polycarbonate roof panels over a partial cover let you use the space in weather without the weight of glass.
Shade changes the maintenance equation too. Composite in full sun needs little beyond an annual rinse; the same material under tree cover grows slick with mildew and wants the same yearly cleaning wood does in those spots.
Frequently Asked Questions
What materials do I need to build a deck?
Pressure-treated lumber, cedar or redwood, or composite decking, plus galvanized or stainless-steel screws, joist hangers, post bases, and concrete for footings. Pressure-treated pine is cheapest and stocked everywhere; composite costs most upfront but skips sealing and staining later.
Do I need a permit to build a deck?
Often yes, though many municipalities exempt freestanding decks under 30 inches high. Size, attachment to your house, setbacks, and height restrictions all trigger permit requirements that vary by location.
Call your local building department with your planned dimensions to know for certain; the fee is fixed, but the cost of building without one is not.
How do I maintain my deck?
Sweep or blow leaves off every few weeks, clean wood twice yearly, and reseal wood every 2–3 years to block UV and rot.
Check connections before and after winter, tightening bolts and watching for shifting boards. Composite needs only an annual wash to clear mildew from shaded spots.
What is the 3-4-5 rule for decks?
It is a carpenter’s trick to check that a corner is square: measure 3 feet along one joist, 4 feet along the next, and the diagonal between those points must equal 5 feet.
If it does, your frame is square; if not, adjust before adding more boards.
What’s the average cost for a 20×20 deck?
Sizing the deck to actual lumber lengths, rather than cutting half boards to scrap, saves the most money.
Can you provide a guide for building a deck for beginners?
Start small, call 811 before digging, and bring your sketch to the lumberyard for beam sizing help.
Do I need 2×8 or 2×10 joists for my deck?
Wider post spacing needs a deeper beam, and joist hangers belong on every connection regardless of board depth.