Handmade ornaments run from a watercolor set and a free evening to a vinyl cutter and a weekend, and the project that fits you depends on whether you need something by this weekend or something that marks a first Christmas worth keeping.
[link-whisper-related-posts]1. DIY Indigo Marbled Ornaments
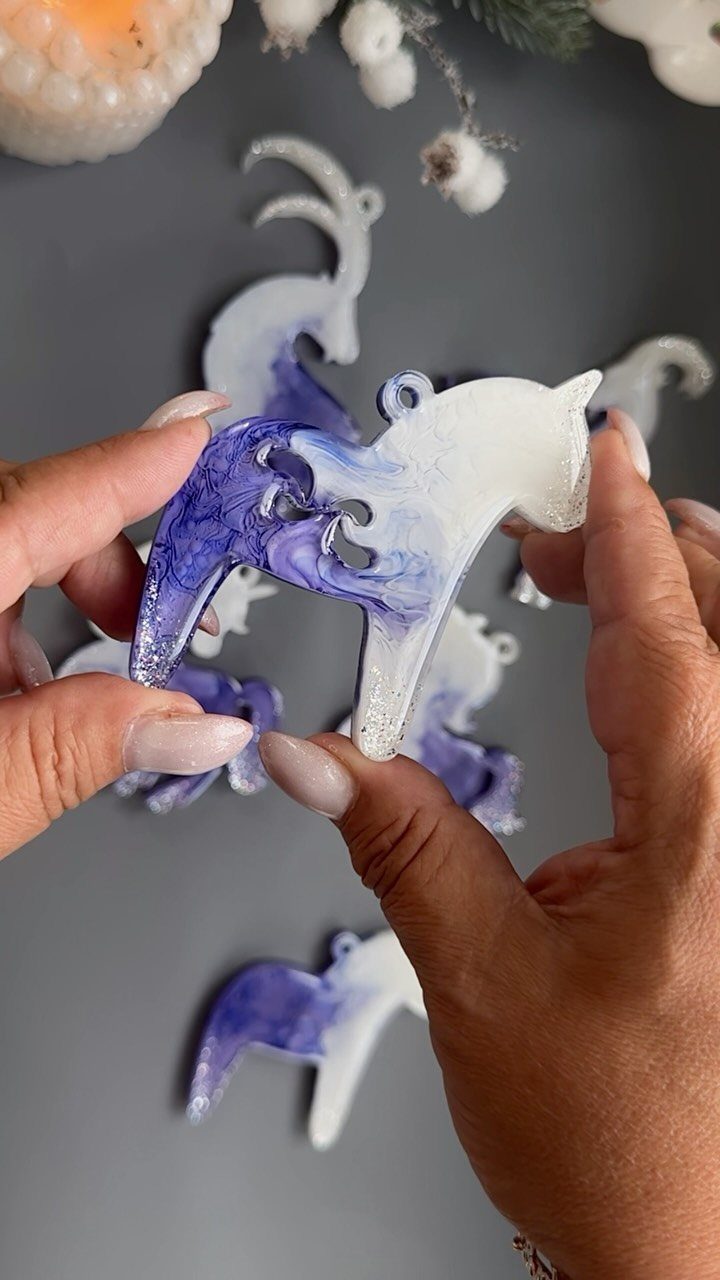
A horse or reindeer cut from air-dry clay takes nail polish marbling better than you’d expect. Room-temperature water, a few drops of indigo polish, and a quick dip before it skins over keep the polish from clumping on the surface.
I tried this on a plain ball first; the shapes work because the flat sides let you control the swirl instead of fighting gravity.
Work over newspaper and wear gloves you hate.
The marbling lasts because the clay soaks up a thin layer of polish, but thick coats crack by New Year’s. Let each piece dry overnight before threading twine.

Stress-Free Crafting - DAS airdry clay boasts a smooth, even texture that doesn't require oven-baking; the clay air-hardens for an easy and fuss-free creative experience when crafting


Merry Christmas Clay Kit – Everything You Need for Festive Fun in One Box! This all-in-one christmas air dry clay kit comes with 12 individual boxes—perfect for holiday parties, classrooms, or multiple kids crafting together. Each box contains 4 vibrant colors of modeling clay, plus easy-to-follow, step-by-step instructions for creating 12 Christmas-themed models, from jolly snowmen to twinkling Christmas trees. The kit also includes 4 sculpting tools designed for little hands, so children can shape, carve, and detail their holiday creations with confidence. As a complete christmas clay kit, it has everything needed to start right away.
2. DIY Paper Ornaments
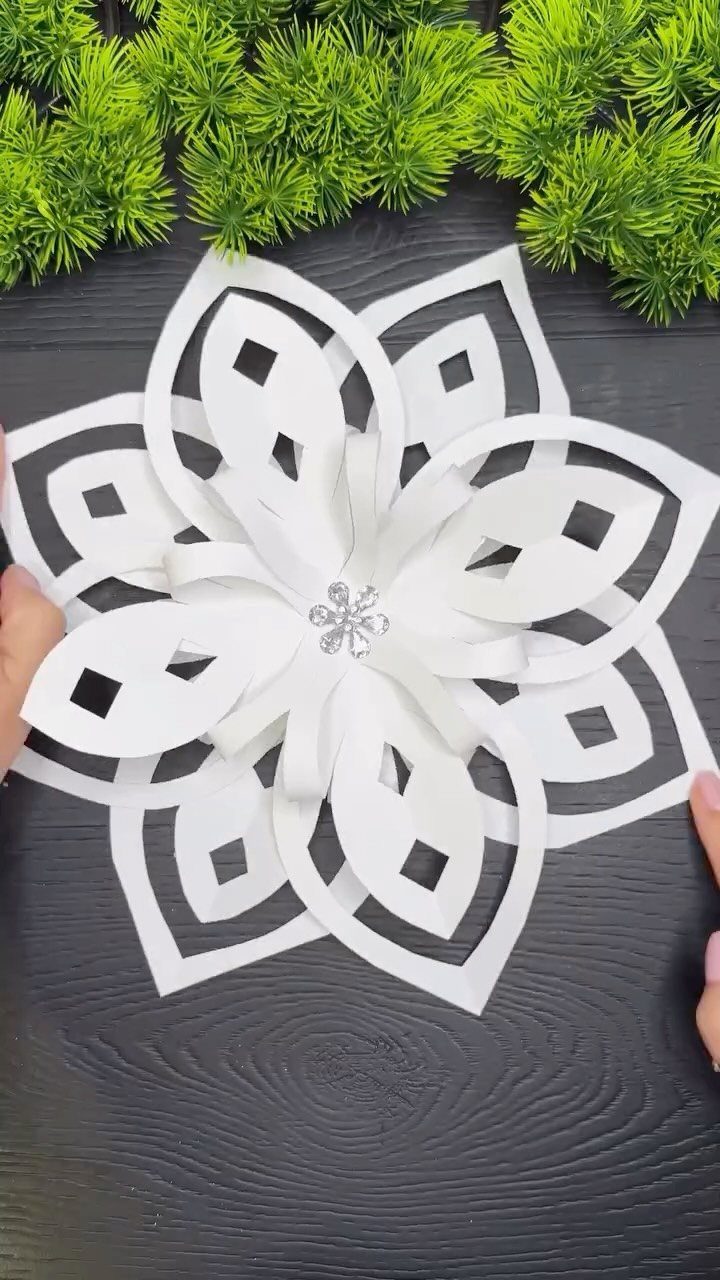
White paper and glue build snowflakes that read as lace from across the room. A rhinestone center catches tree lights better than plain paper, but a button or a bead works if that is what you have.
Fold identical wedges, cut freehand, and glue the seams. Heavier cardstock holds the shape through storage; thin paper wilts by December 15.
One sheet yields multiple flakes in two sizes. The time is in the cutting, not the assembly, so this suits an evening with a movie you have already seen.

Super Value Snowflake Pack : You will get a package of 36 pcs 3D snowflakes hanging snowflake ornaments with ropes The Christmas decor snowflake is a great option for outdoor and indoor Christmas decorations.

Snowflake ornaments kit: you will receive 36 pieces of Christmas snowflakes hanging ornaments in different sizes and styles, and each paper snowflake comes with a rope for easy hanging, sufficient quantity and various styles to meet your different decoration needs.

Snow Flakes Decorating: You will receive 30 snowflake christmas tree decorations, 18 of them are designed with 3D effect, 3 sizes in total, exquisite and not monotonous. The other 12 pieces are made of delicate cut-out snowflake flakes in a total of 3 different snowflake shapes. These white ornaments for christmas tree match perfectly with all kinds of Christmas decorations, adding more romance and festive atmosphere to your home
3. DIY Clay Rainbow Ornaments
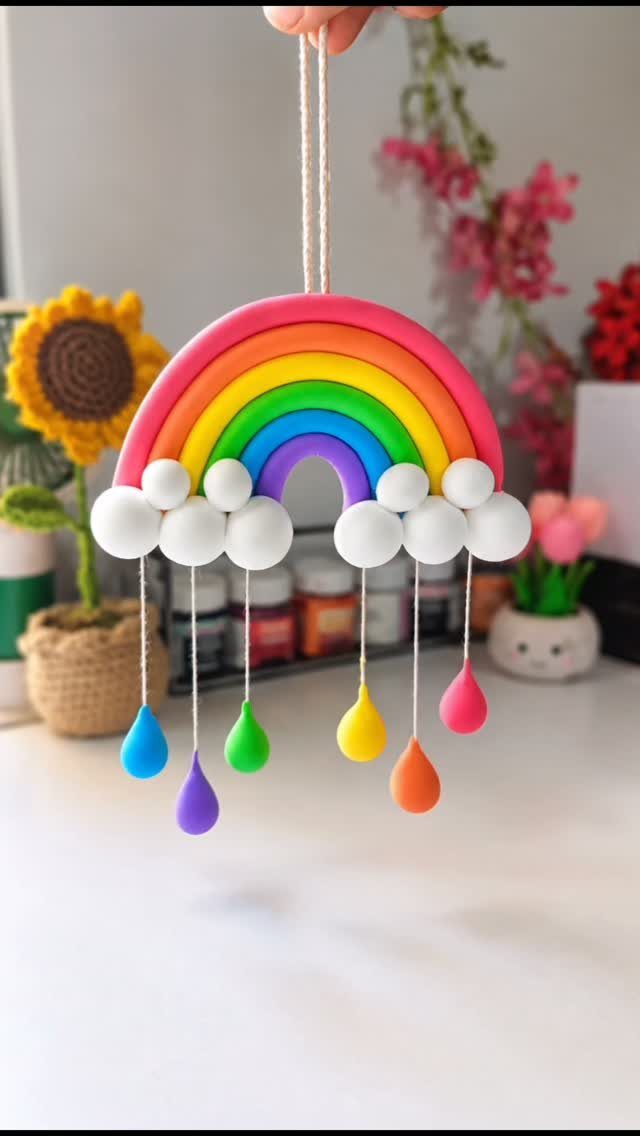
Polymer clay shaped and baked into a rainbow with dangling drops, the kind of ornament a small child points at first.
Paint after the clay dries fully, usually overnight.
I have learned to poke the hanging hole before the clay sets; a drinking straw works. The drops tangle in storage, so I nest this one in its own small box, a tissue box cut down.

🌟PACKAGE - Net weight 210 grams Christmas Polymer Clay Slices,Composed of 28 Christmas styles,Made of soft pottery and resin. Various styles, you can buy according to your needs. Mini resin assortments are suitable for hair accessories,jewelry making accessories.

🌟PACKAGE - 120g/pack Polymer Clay Slices,Composed of 10 Christmas styles,Made of soft pottery and resin. Various styles, you can buy according to your needs. Mini resin assortments are suitable for hair accessories,jewelry making accessories.

Generous Candy Cane Set: This set includes 60 mini candy canes for crafts, with 15 pieces in each of 4 vibrant colors. Measuring 1.2×0.5 inches, these candy cane ornaments are perfect for decorating Christmas trees, creating festive DIY projects, or adding cheerful touches to gifts.
4. DIY Mod Painted Wood Ornaments
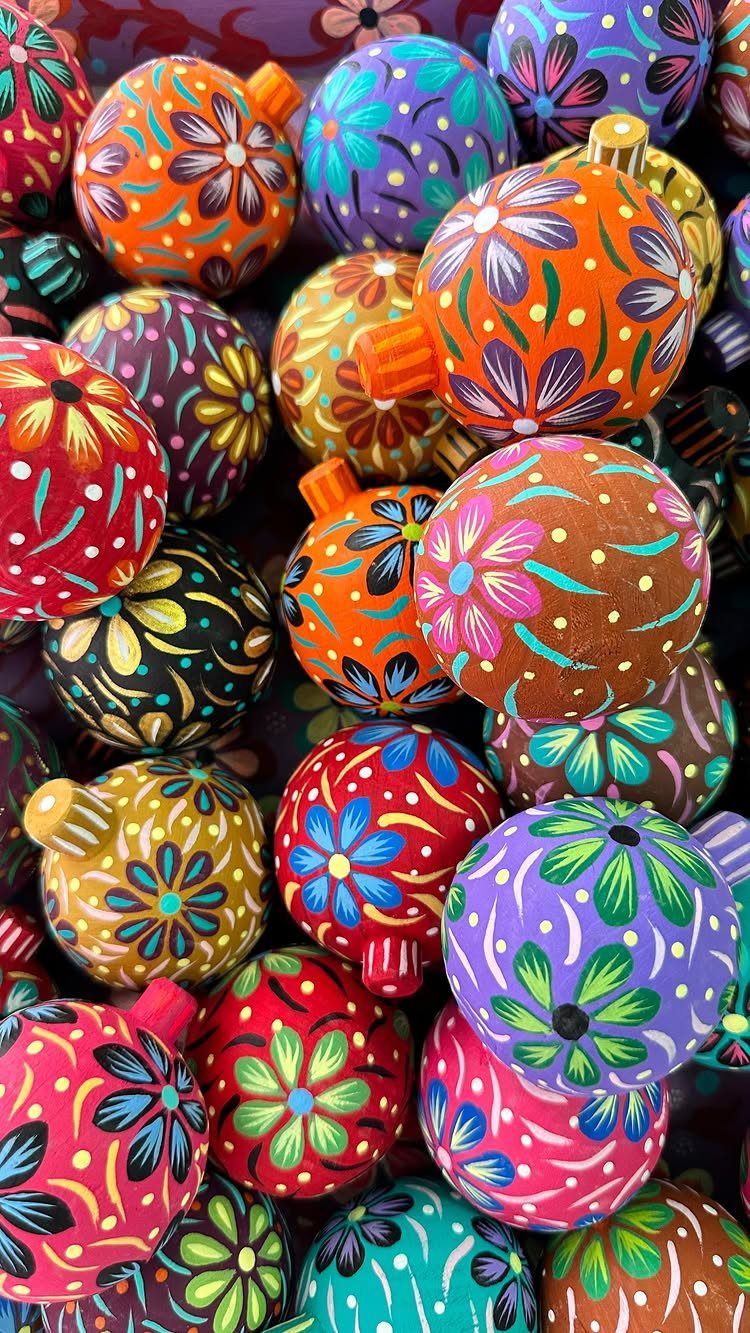
Round wooden balls painted in bright florals and dots suit a small tree because the scale is already small.
The patterns look mod, which is to say bold and flat, not shaded or realistic; a kid’s acrylic paint and a thin brush get you there.
I prime first with white acrylic so the colors stay true. Two coats of paint, one of clear sealant, and the surface survives being dropped on carpet.
These are light enough for paper clips to hold if you run out of hooks. A dozen fills a tabletop tree without crowding it.

DIY Christmas Ornaments: Celebrate the season with our Christmas craft kits that include 50 wooden ornaments(snowflakes/rounds/Christmas tree/Christmas stocking/Christmas hat), 50 twine strings, 2 paint brushes, 12 acrylic paint, 6 glitter, 1 palette, 4 color pens, and 1 gem sticker.

SET OF 6 ORNAMENTS: Includes 6 wooden Christmas ornaments, perfect for decorating your holiday tree or home.

Charming DIY Christmas Keychain Set: Create 24 personalized keychains featuring 12 delightful designs including snowmen, Santas, trees, penguins, and gingerbread figures. Ideal for holiday parties, group gatherings, and family craft nights, this kit brings creative enjoyment to December celebrations. Each wooden ornament offers a ready-to-paint surface that sparks imagination and adds cheerful holiday spirit to your home.
5. DIY Fabric Covered Tree Ornaments
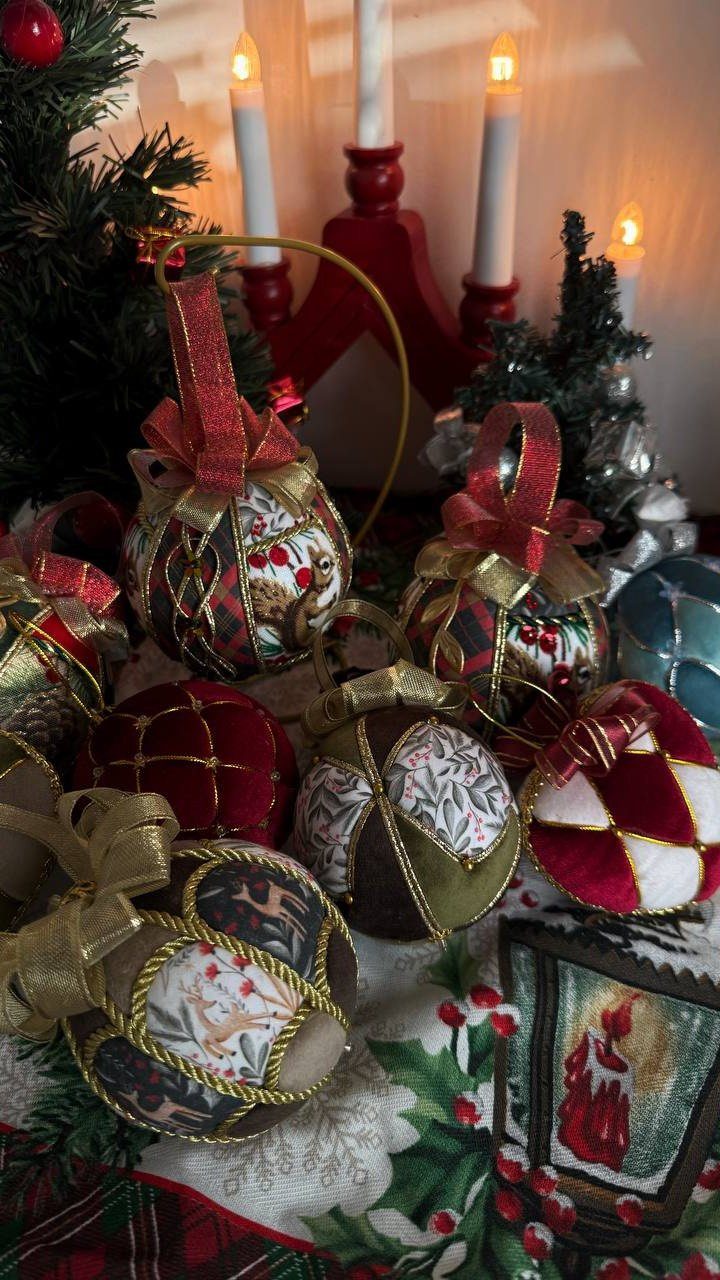
Plain glass balls wrapped in fabric become something that reads as heirloom, especially with gold cord hiding the seams. Velvet and small prints both work; cutting on the bias lets the fabric curve without puckering.
Glue goes on the ornament, not the fabric, and in thin lines. I start at the top, smooth downward, and trim the overlap to a single seam.
Gold trim glued over that seam saves the look if your line wanders. These weigh more than plain glass, so branch placement matters: lower and center, not the tips.

Material: the Christmas icicle decoration is made of glass, beautiful accessory for Christmas tree

Easy to Use: inspire your creation effortlessly, the gold trim can be cutted to any length you want and then stitched or hot glued on. You can melt the end to avid fraying, the gold rope widely used for costume and upholstery embellishment. Nice added decoration.

This festive set of embossed mercury glass ornaments features various holiday silhouettes in a glamorous hue
6. DIY Hand-Painted Pastel Ornaments
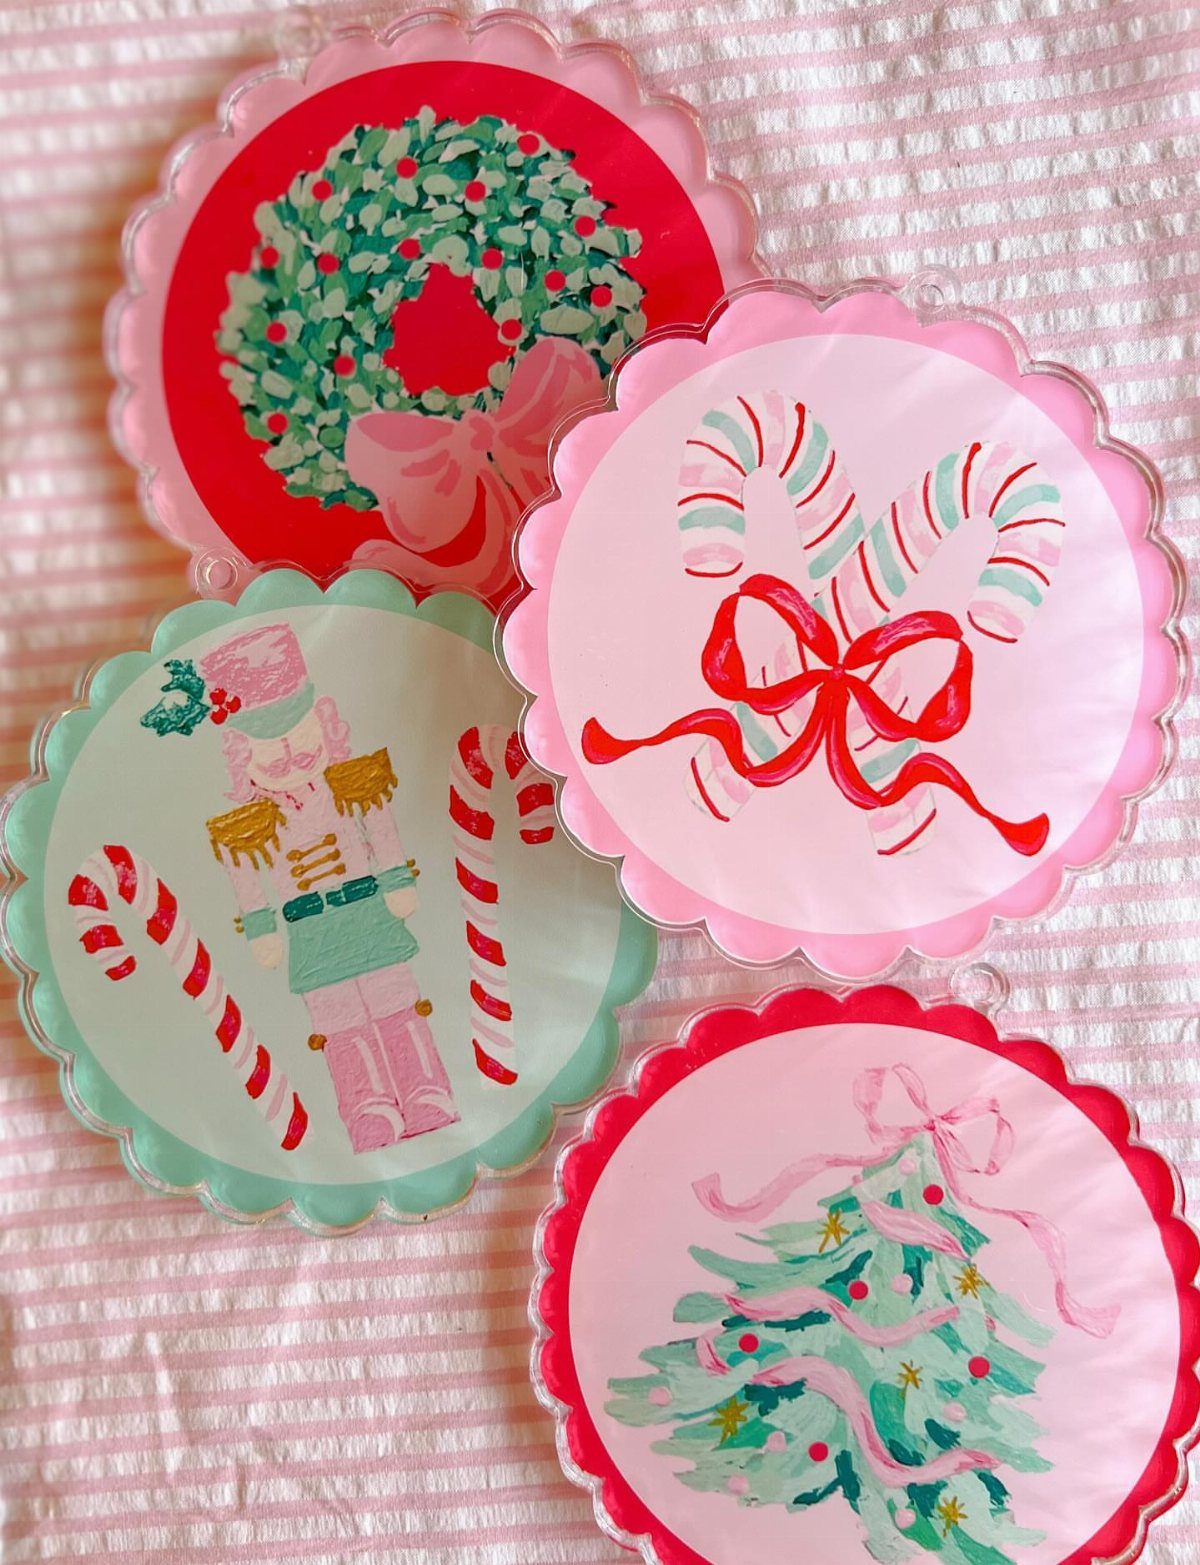
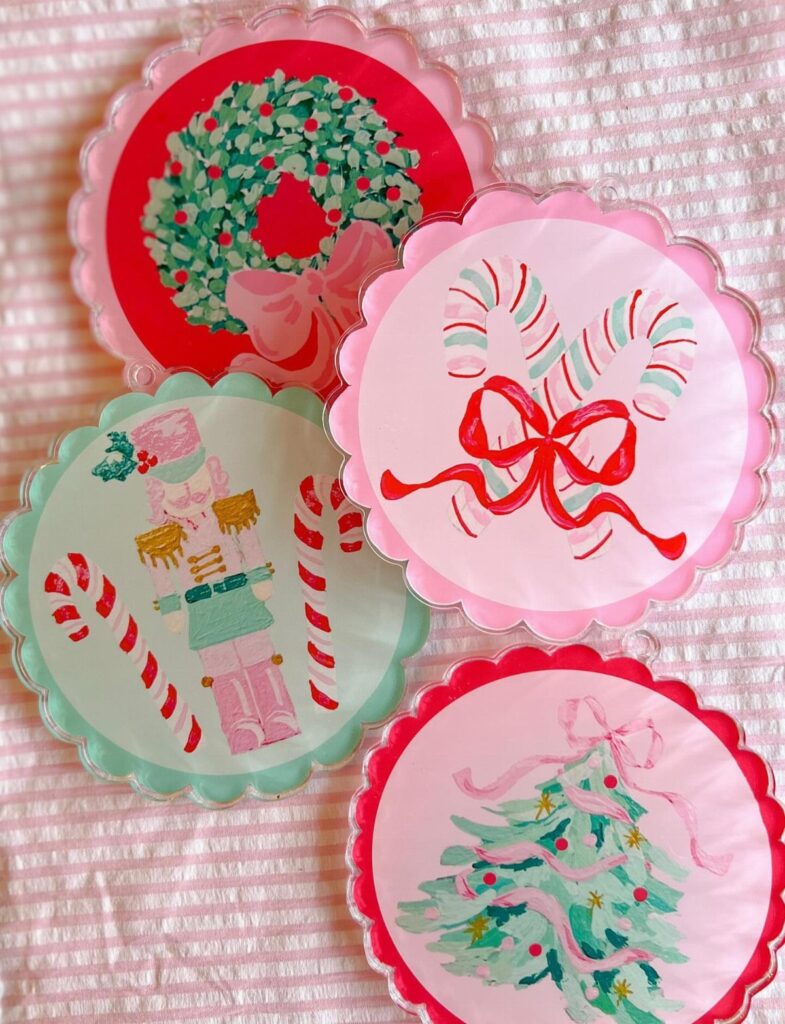
Scalloped acrylic discs take pastel paint in holiday shapes that look almost like watercolor, the transparency letting light through the unpainted parts.
The wreath, candy canes, nutcracker, and tree share one palette, which is how they read as a set without matching exactly.
Acrylic needs no primer, but it does need the paint fully dry before flipping to do the back; I wait until the surface is hard and still smudge one in three.
A size 2 brush and a steady hand get the detail; transfer paper and pencil work if your hand is not steady. These hang best where daylight hits them, not deep in the tree.

VIBRANT CLAY KIT - Our air dry clay kit includes 12 different boxes,8 sculpting tools,and extra sealing bags.You can also mix and match any way you like to create your desired colors

Air Dry Clay Varnish: Clay varnish Prevents air drying clay from drying out cracks, scratches, scuffs and abrasions on the clay, glaze for air dry clay is also watertight and fireproof, and dries to transparent, high gloss finish

Christmas Theme Clay Kit: Unleash creativity with our complete air-dry clay set! Includes 12 individual boxes of premium clay (each with 4 vibrant colors), 4 sculpting tools, and step-by-step tutorials. Easily craft 12 lifelike Halloween models using illustrated guide cards. The innovative compartment box keeps colors separated, and leftover clay stores neatly in the sealable container—mess-free fun anywhere!
7. DIY Initial Holiday Ornament
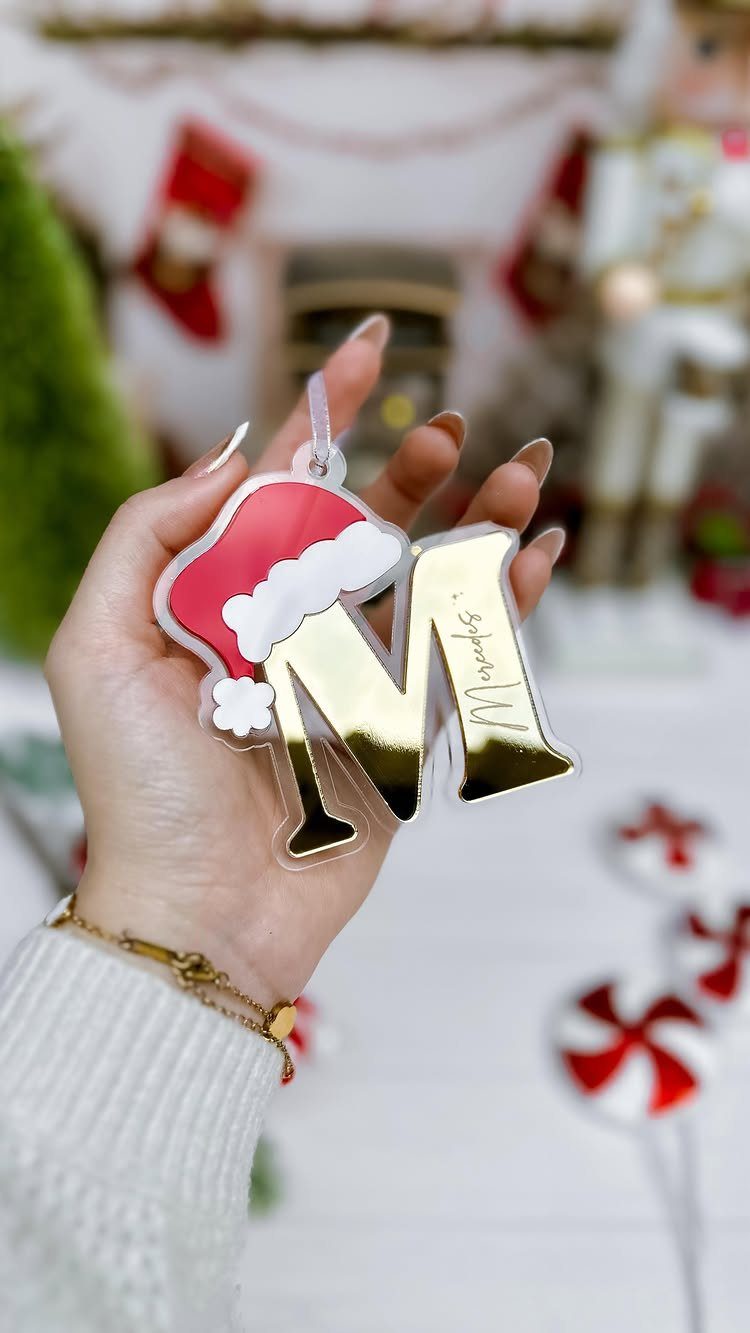
An acrylic letter wearing a tiny Santa hat turns a single initial into a place card for the tree. The name underneath, in matching script, makes it a gift that lands harder than anything from a big-box shelf.
This needs a vinyl cutter or a steady hand with letter stickers; the hat is felt and glue, nothing sewn.
I would make one for each kid in the family and hang them in birth order, left to right. The acrylic blanks come in packs at craft stores, and the cutter does the hard part while you drink coffee.

Skyhorse pub colorcut&fold christmas ornaments bk

36 Snowflake Ornaments in 3 Sizes: Includes 16 large snowflakes (4"), 10 medium snowflakes (2.6"), and 10 small snowflakes (1.8") in 2 different styles, creating a layered winter decoration

8. Salt Dough Handprints Ornaments
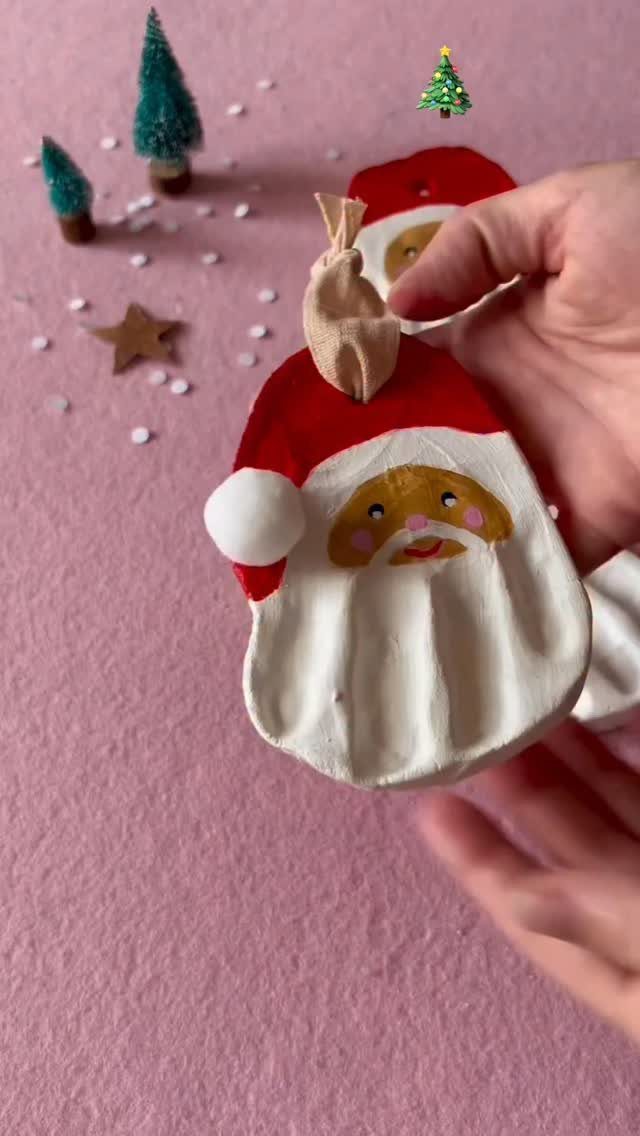
Salt dough handprints bake hard at 170 degrees and take paint like a porous canvas. Thickness matters more than anything: roll too thin and the fingers disappear; too thick and the middle stays soft no matter how long it bakes.
Flour the child’s hand first, or the dough grips like clay. Poke the hanging hole before the print goes in; after, the surface is too fragile.
I have seen these painted as Santas, reindeer, or left plain with just the year and a name. They crack if you store them loose, so wrap each in tissue and keep them flat.

🌟PACKAGE - Net weight 180 grams Christmas Polymer Clay Slices,Composed of 24 Christmas styles,Made of soft pottery and resin. Various styles, you can buy according to your needs. Mini resin assortments are suitable for hair accessories,jewelry making accessories.

🎄 Christmas Clay Cutter Set: Featuring five styles of Christmas trees, snowflakes, Santa Claus faces, gingerbread men, and gingerbread houses in coordinating sizes, this set lets you craft a whole winter village of festive earrings and ornaments.
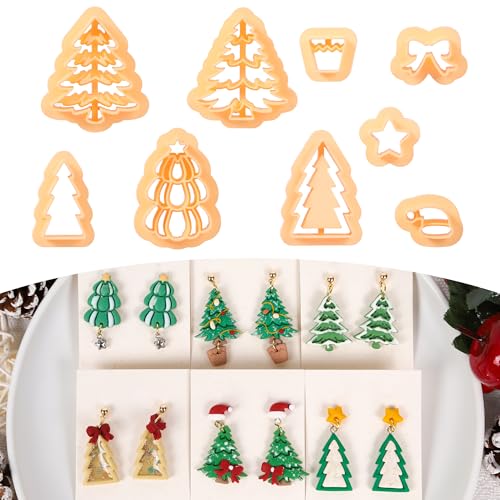
Charming Christmas Tree Set: This delightful collection features 4 unique Christmas tree shapes, perfectly complemented by 4 mini decorative cutters: a flower pot, star, bow, and Santa hat to adorn your creations
9. Felt Pinecone Ornament
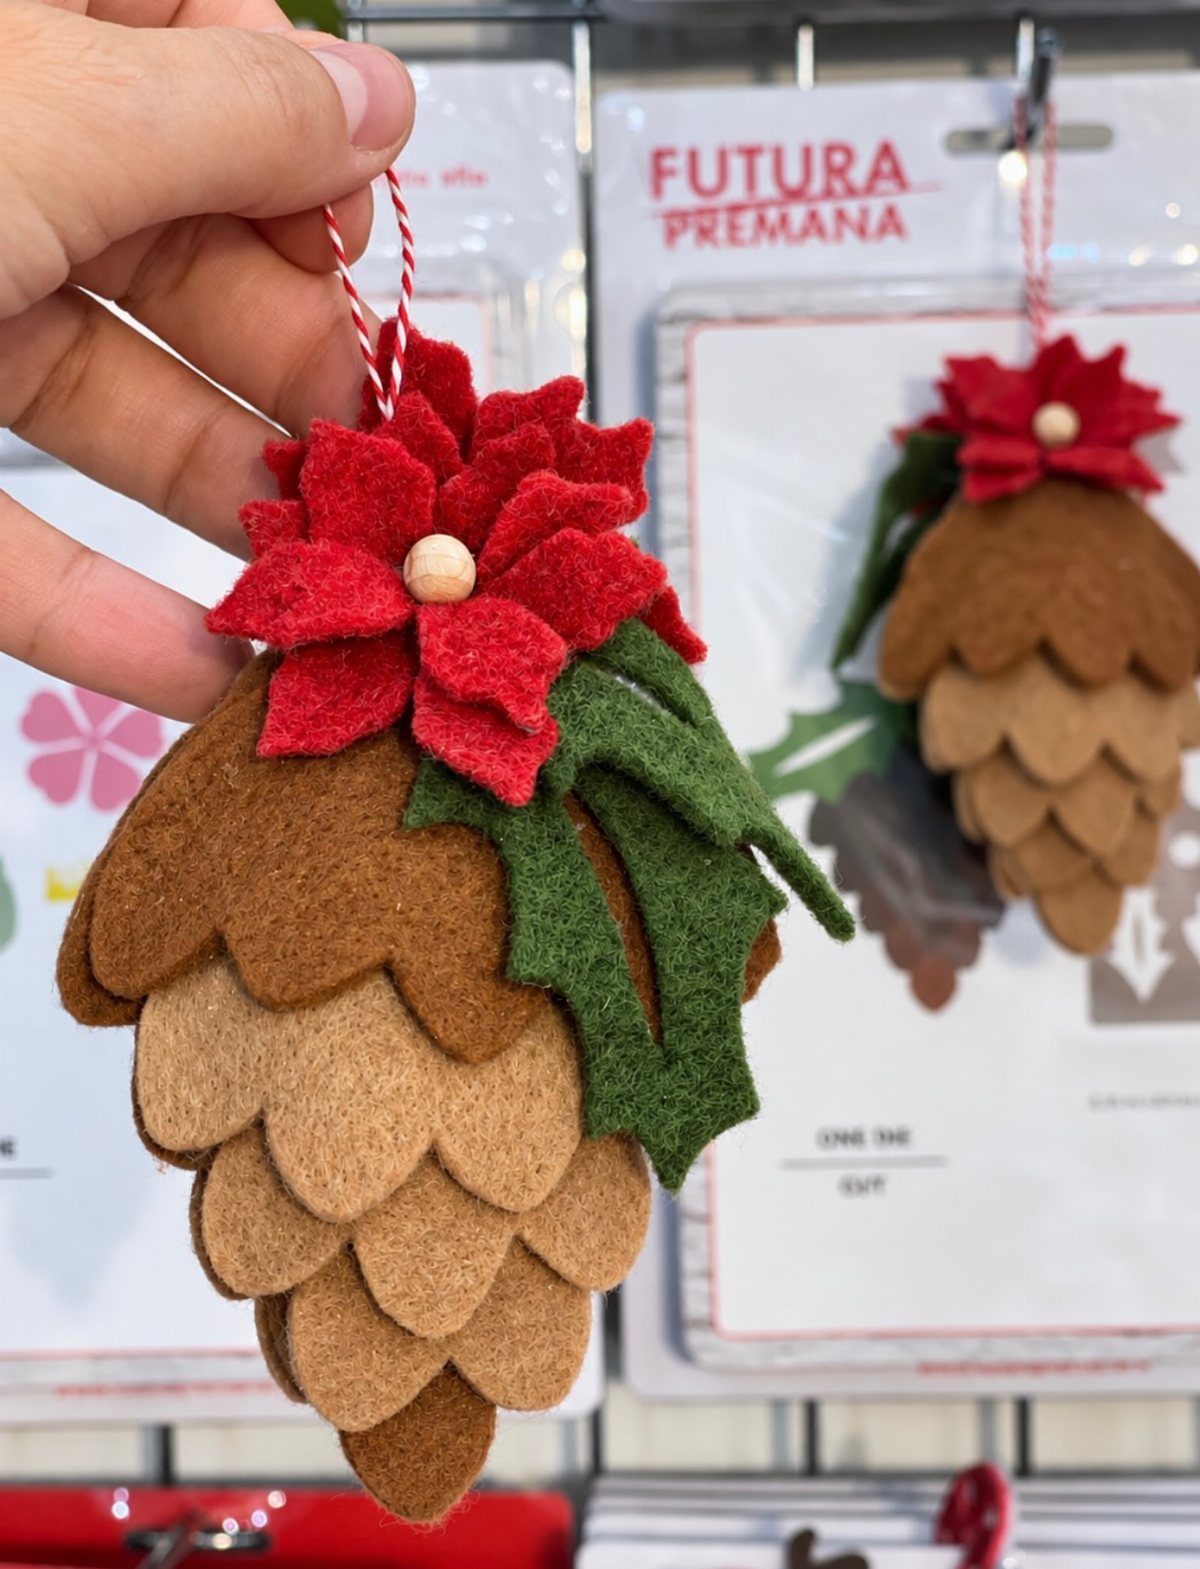
Layered felt scales built from the tip down make a pinecone that weighs almost nothing and never drops needles. The poinsettia on top is a second layer of felt, glued or stitched, with a leaf collar underneath.
Cutting the scales takes an evening; assembly is glue and patience. I would use wool-blend felt, the cheap acrylic kind pills by year three.
A dab of craft glue at the base of each scale holds it until the next row covers the seam. These store flat in a shoebox, which matters more than it should.

✨【Complete 6‑Pcs Christmas DIY Ornament Kit】This all‑in‑one set includes 6 pieces 3.15×3.15 inch pre‑drilled round wooden ornament blanks, round resin gems, glossy pearls, sticky clay, diamond painting applicator pen, sorting tray and natural jute hanging twines. All craft supplies are ready for you to start DIY right out of box

Christmas Ornament Craft Kit: This complete DIY Christmas ornament kit comes with all supplies. You will receive 20 natural round wood slices, 12 color paints, 5 colored paint pens, brushes, a palette, gem stickers, and 6 sparkling glitter. Everything you need for the perfect Christmas craft is right here.

【6 FESTIVE WOODEN CHRISTMAS ORNAMENTS】Create a cheerful holiday display with 6 Christmas wooden ornaments in a variety of festive designs. This coordinated set is perfect for decorating your Christmas tree, mantel, window, shelf or seasonal craft space.
10. Personalized Vinyl Letters Glitter Ornaments
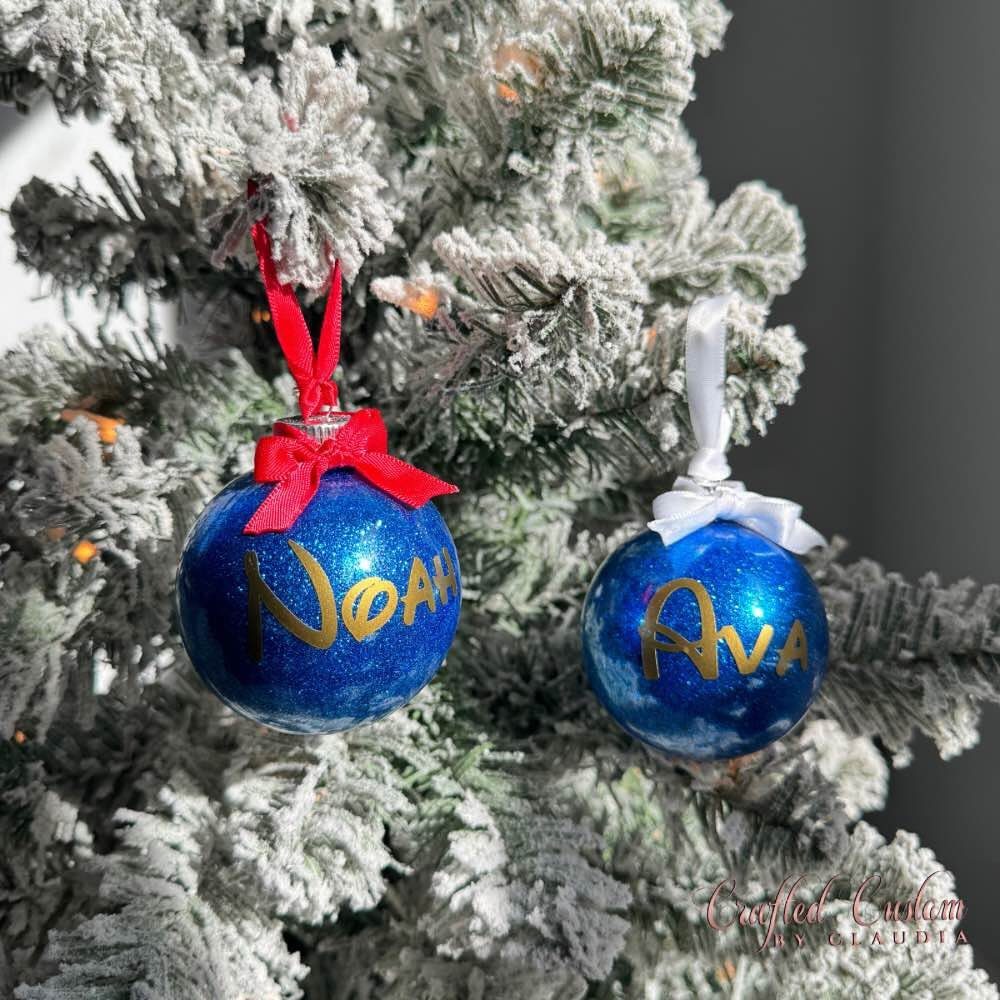
Glitter balls with vinyl names read as custom-ordered from a boutique, but the work is over fast if you have a steady hand for the peel.
Thin script looks most like a gift tag; block letters work too, but script reads as something you planned ahead for.
You need a vinyl cutter for this, or patience with store-bought letter sheets from the scrapbooking aisle.
The bow covers the top seam and gives each one its own color code: red for Noah, white for Ava, easy to spot on a crowded tree.
I would make these for new babies, new houses, any first that needs marking.

Ultimate Festive Splendor: our package offers you 6 carefully packaged gold mercury glass Christmas balls, measuring approximately 8 cm/3.15 inches, with brown velvet ribbon, easy to hang, intricately designed to create a stunning effect, particularly when they catch and glow in the lights; They make your festive season all the more enchanting

✪Basic✪: The set of 9pcs 3⅛ inch Christmas glass ball ornaments for tree decoration is well packaged in paper box.

Complete Ornament Set: this Christmas gold silver glass ornaments includes 6 glass Christmas ornaments with balanced height variation: 3 tall at 7.09 inches and 3 short at 5.91 inches; These beaded glass ornaments create a layered look for christmas tree decorations
11. Embroidered Felt Heart Ornament
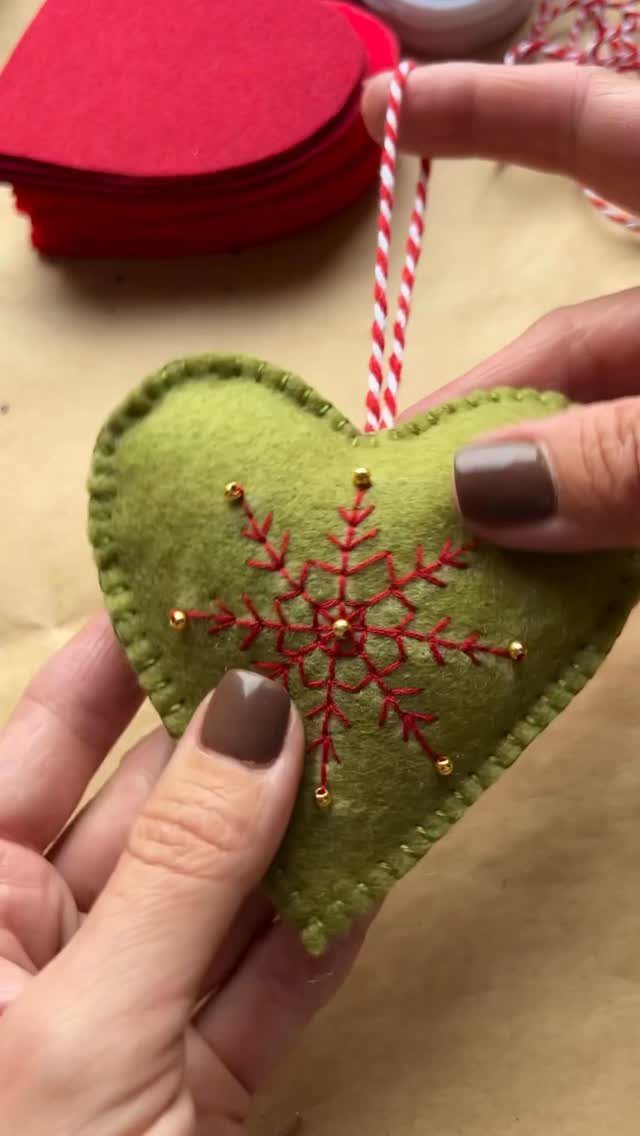
A felt heart with embroidered snowflake and seed beads reads as folk art from a distance, up close as someone cared enough to count stitches.
The green ground and red thread are a color pairing that only works at Christmas; any other month it would clash.
This needs embroidery floss, a sharp needle, and eyes that can thread it. The baker’s twine loop is structural, not decorative; felt stretches under weight, so the loop must be sewn through multiple layers.
I would sketch the snowflake first in pencil, then stitch over it. The beads go last, one per point, or they snag the floss.
12. Macrame Angel Ornaments
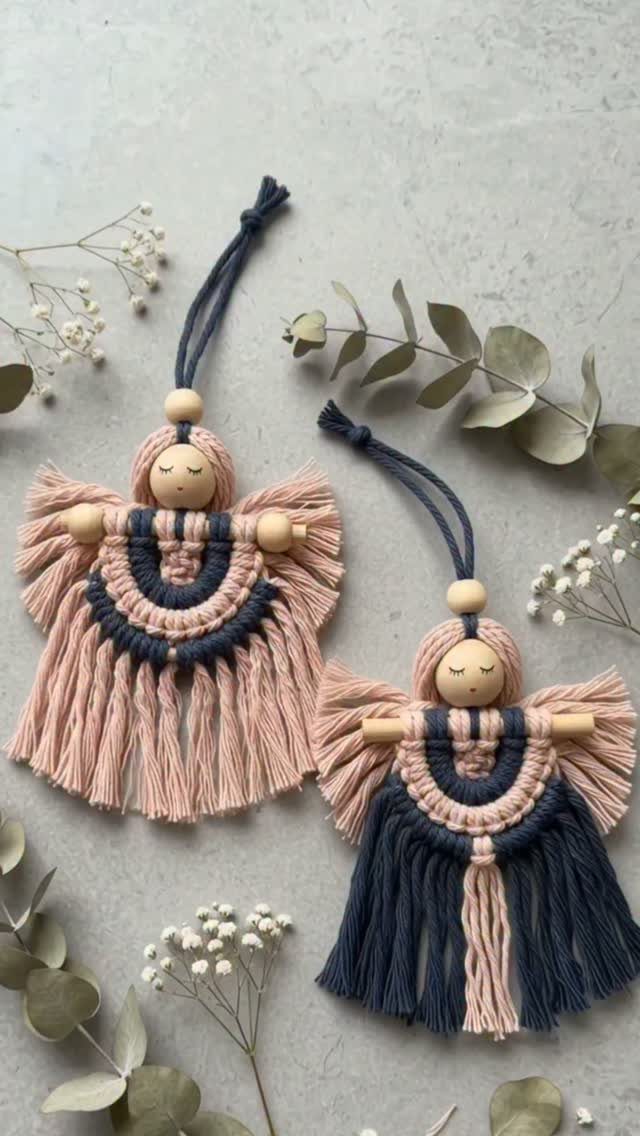
Macrame angels with wooden bead heads and fringe skirts bring back a vintage craft with better proportions. Square-knot body, wrapped arms, gathered skirt: the same pattern works in any color pairing.
Cotton cord in 2 weights builds the structure; the bead needs a hole wide enough for a double strand.
I would practice the head wrap on a scrap bead first; tension matters, loose looks sloppy, tight cracks the wood. These hang light enough for a paper tree, a desk plant, a rearview mirror.
13. Faceted Jewel Bead Ornament
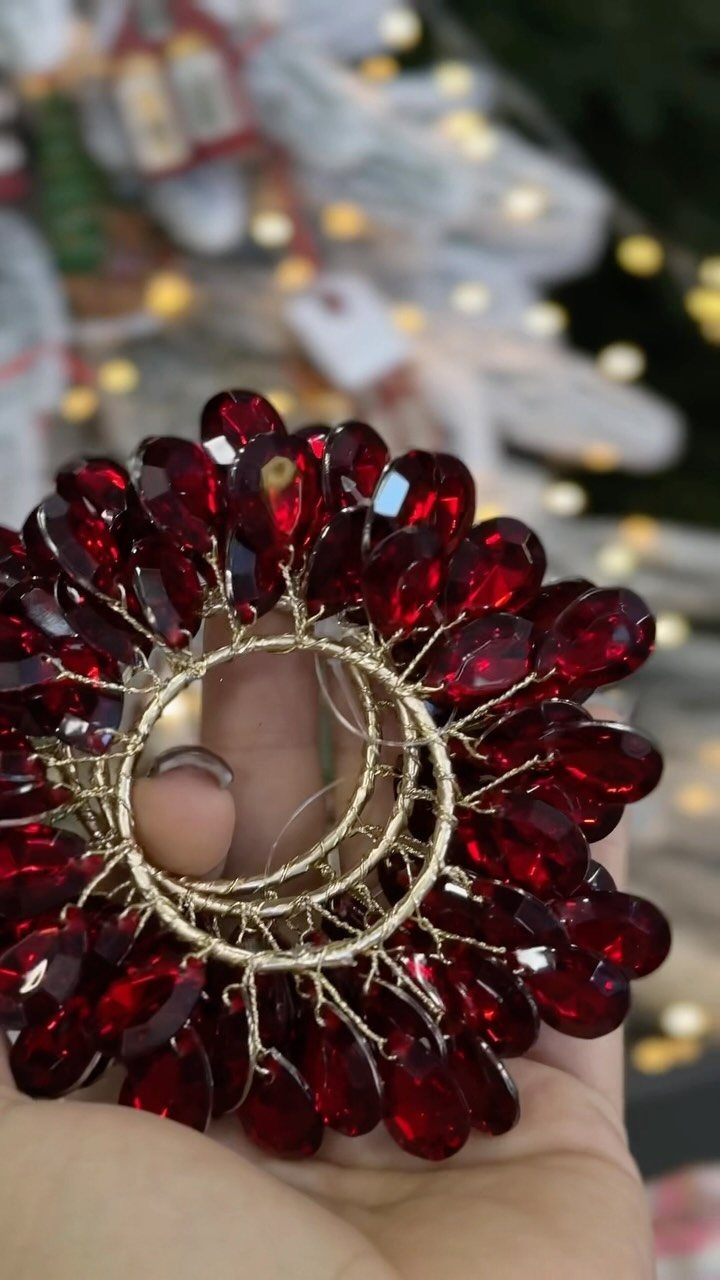
Faceted beads and gold wire build a floral disk that catches light like a brooch. The wire frame needs pliers and patience; each bead sits in its own loop, and the pattern grows from the center outward.
Bead caps at top and bottom hide the assembly and give it a finished edge. I would use two at the hanging point, one looks thin.
Hot glue sets fast, so position before you press. These weigh more than they look; hang them on a branch that can take it, not the spindly top of a tabletop tree.
14. Vintage Decoupage Bauble
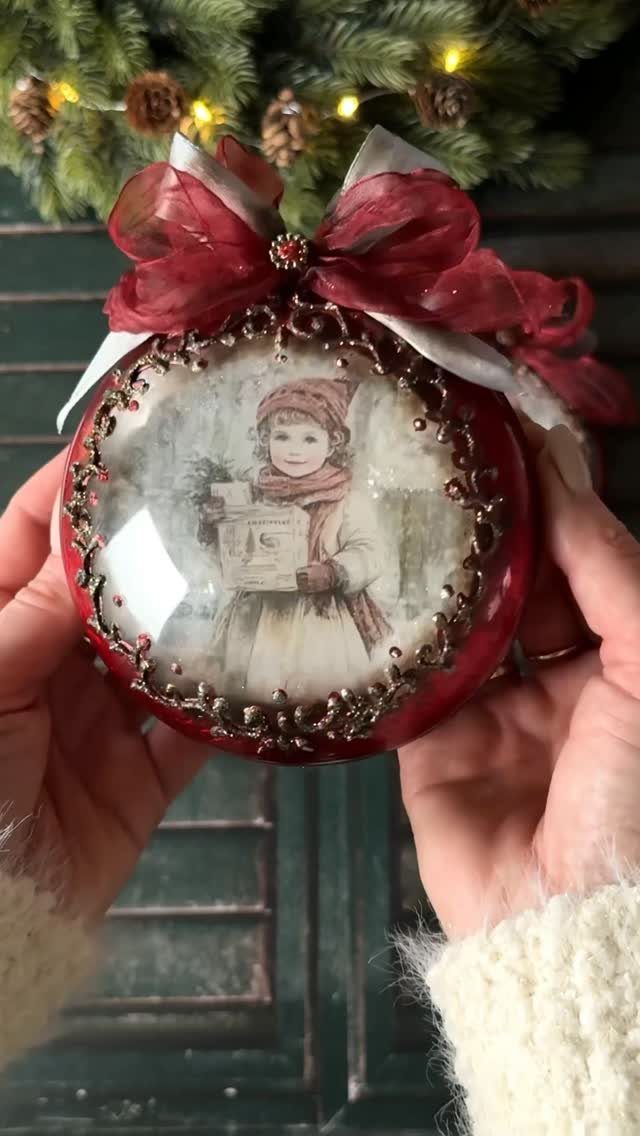
A plain red bauble becomes a keepsake when a vintage winter scene meets metallic trim and a bow that nearly dwarfs the sphere.
Decoupage is forgiving; the paper softens in glue, then you smooth it onto the curve and trim the overlap.
The image drives the whole look, so choose one with the grainy color of old postcards, not modern clipart. Metallic trim glued around the edge hides any ragged cut and frames the picture like a locket.
The bow is structural too; it covers the hanger cap, which never looks good bare. This suits someone with a printer and a bottle of Mod Podge, not much more.
15. Sparkling Beaded Baubles
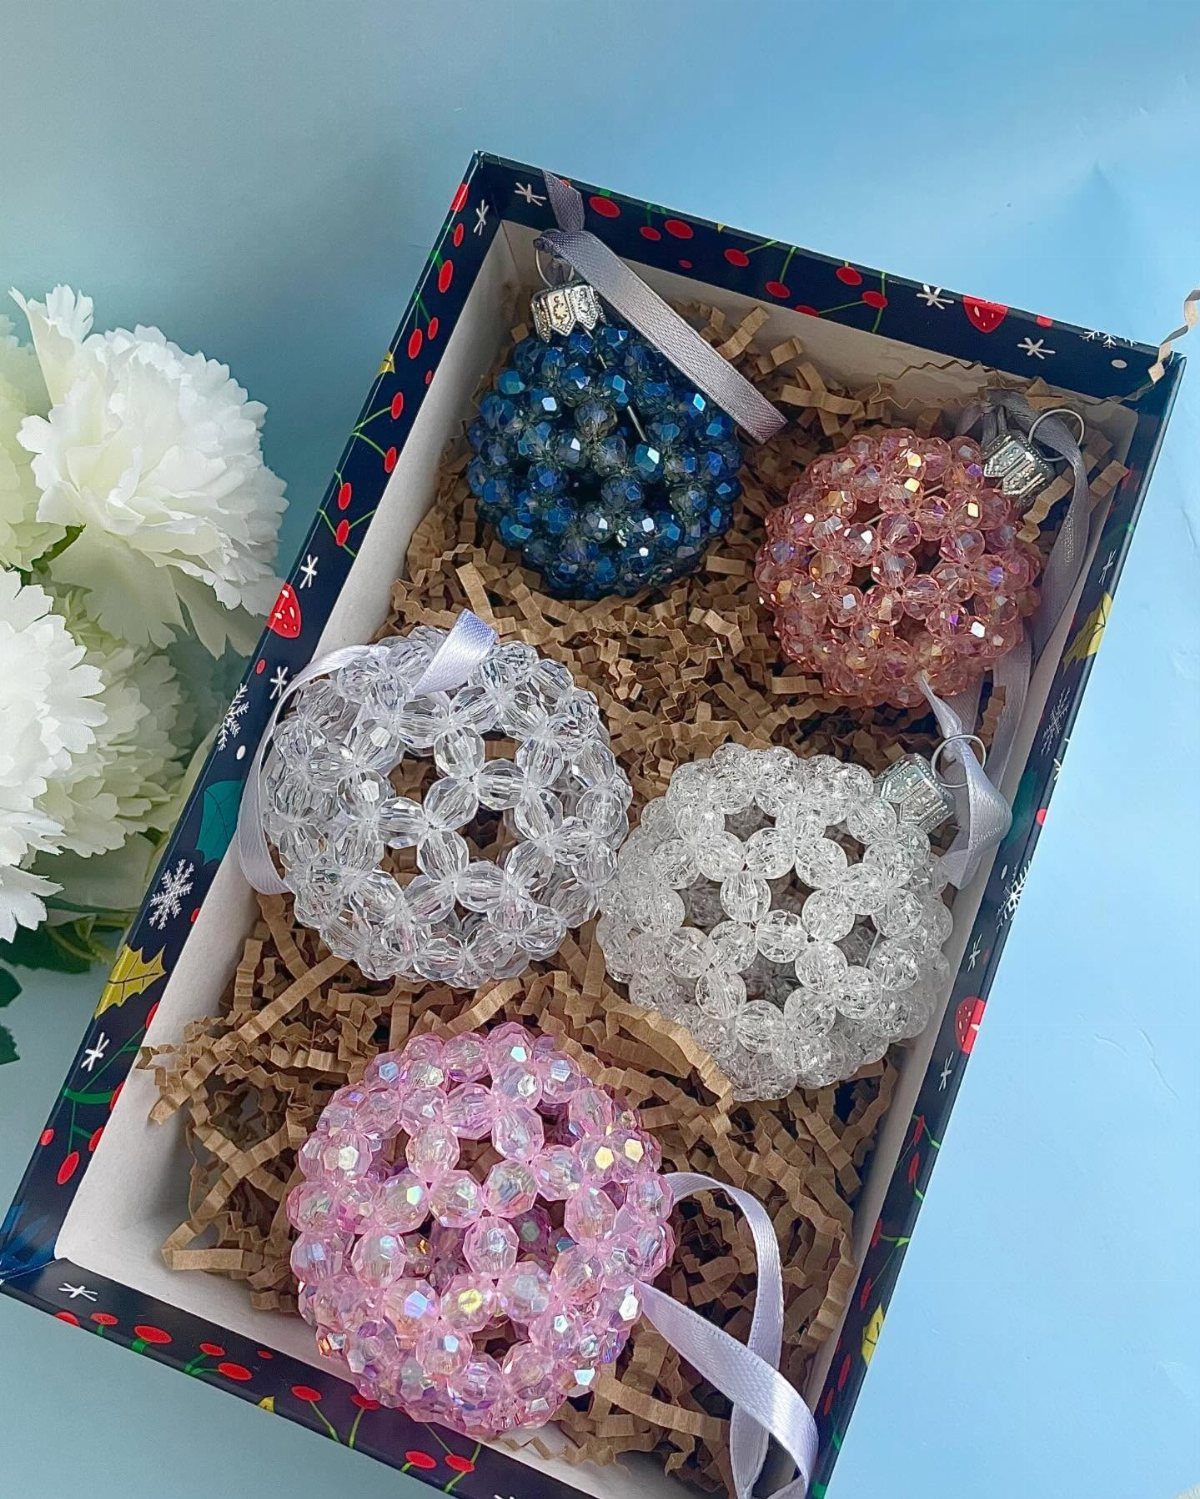
Hollow spheres built from faceted beads in blue, pink, and clear read as candy from across the room. The beads sit in ordered rows, not random scatter, which is what makes the surface hold together as a shape.
These need a form underneath, a solid styrofoam ball or a blown-glass blank, and glue that dries clear.
The color order is the decision that matters; I would pick two colors and a clear, not three saturated ones fighting each other. They store nested if you pad between them; the beads themselves are harder than the finish underneath.
16. Crackled Bird Illustration Bauble
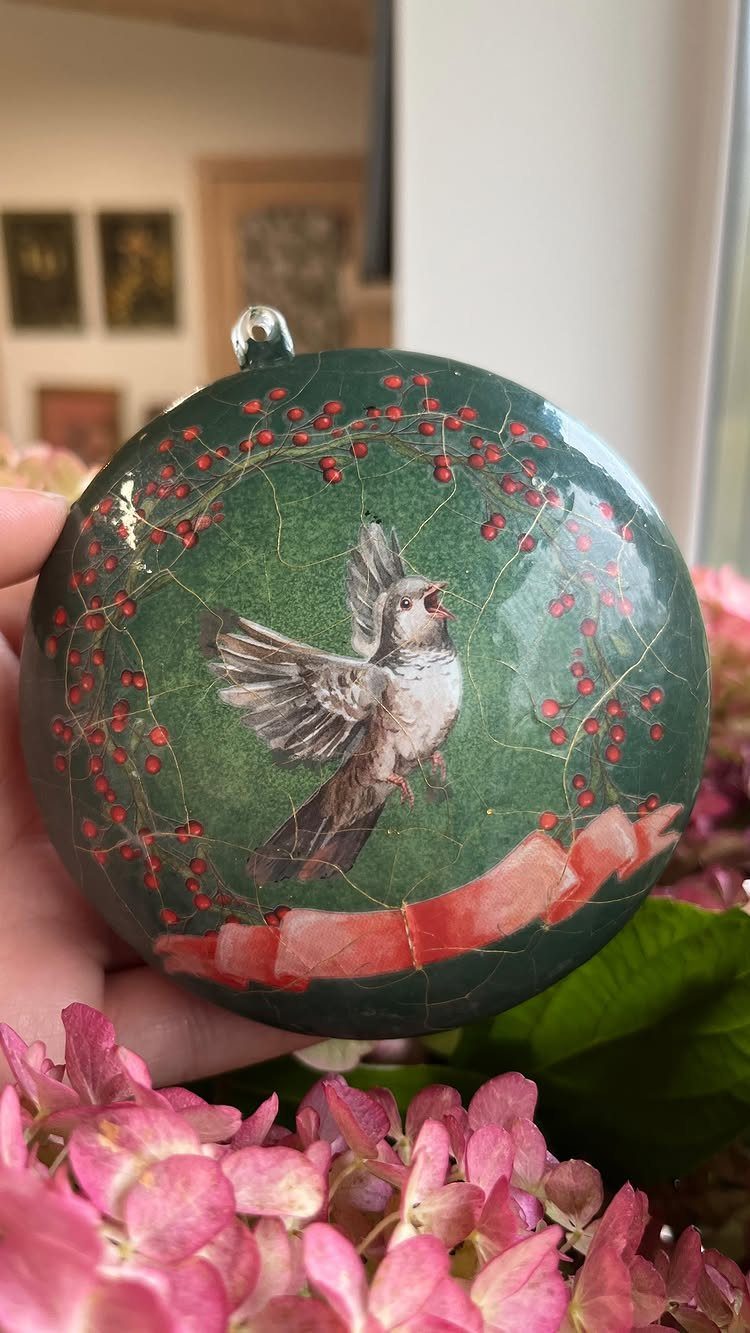
A crackle finish behind a singing bird turns a flat disk into something that looks found in a barn, not bought last week.
The crackle medium goes on before the image, not after; the paint shrinks as it dries, and the bird layers on top.
The green ground and red berries are a Christmas palette that would look wrong in March, which is the point. A satin ribbon loop keeps it light enough for thin branches.
I would test the crackle on scrap wood first; too thick and it flakes, too thin and it barely shows. The bird illustration needs to be small and busy; large simple shapes read as decal, not decoupage.
Materials Needed for Ornaments
Most of these projects pull from a short list that repeats across the list. For the marbled animals and the rainbow drops, air-dry clay is what I reach for; it needs no kiln and one bag covers dozens of ornaments.
Satin ribbon handles the hanging loops and the bows, especially on the decoupage bauble where it covers the cap.
A glue gun is nearly universal. Hot glue sets fast enough to hold fabric to glass or felt scales in place while you work the next row.
Tweezers help place beads and vinyl letters; pliers bend the wire frames for the jewel disk. Sharp scissors cut cardstock and fabric clean.
Paint pens, acrylics, and a kid’s watercolor set cover the coloring. A candle or lighter seals ribbon ends, though the flame needs watching and the ribbon kept clear of smoke, which stains permanently.
Benefits of Handmade Ornaments
An ornament made by hand carries weight that store-bought ones do not. The salt dough handprint with a child’s name and year becomes a record of a specific December, not just another ball on the tree.
The vinyl letter with a baby’s name marks a first Christmas in a way no ornament from a big-box shelf manages.
These pieces work as gifts because the labor shows.
A set of painted wood balls in mod florals tells someone you spent 2 evenings on them. Gift toppers made from paper snowflakes or small clay shapes extend the same thought to the wrapping itself.
The cost stays low.
Most projects here ask for little more than what is already in a basic craft drawer, and the time is a weekend or an evening. The trade is skill for money, and the result outlasts the season.
Involvement of Children in Crafting
Several projects in the list scale down to small hands without losing the point. The mod painted wood balls need only a brush and a watercolor set; a child can manage dots and stripes that still read as intentional pattern.
The painting after baking is where they take ownership, turning a print into a Santa or signing the back with the year.
Paper snowflakes reward any kid who can fold and cut; the assembly is glue, which most already overapply with enthusiasm.
Felt pinecones and macrame angels need more dexterity, but a child old enough to manage a needle can stitch the poinsettia on top.
The vinyl letter ornaments, with their cutter-done precision, let a child pick the name and the bow color while the machine handles the hard part.
Safety Tips for Crafting
Open flame demands attention. The candle or lighter used to seal ribbon ends can start a fire if left unattended, and smoke ruins the material it touches.
Work near a sink, keep a fire extinguisher within reach, and never step away with the flame still lit. Children and fire stay separated by an adult’s body at minimum.
Hot glue guns cause more craft-room burns than any other tool. The glue reaches temperatures that blister skin instantly, and the clear kind favored for invisibility offers no visual warning.
Work on a protected surface, keep water nearby for accidental contact, and treat every gun as if it were on until the cord is unplugged.
Sanding air-dry clay throws off fine dust that looks harmless but is not. Work over newspaper and dispose of it damp, before dust spreads.
Small beads and seed beads choke; count them out rather than leaving bowls within reach of toddlers. The wire frames for jewel ornaments have sharp ends after cutting; pliers bend and tuck, fingers do not.
Frequently Asked Questions
What are some easy homemade Christmas ornaments I can make?
Air-dry clay shapes dipped in nail-polish marbling, folded cardstock snowflakes with a rhinestone center, and painted wooden balls all come together in an evening or a weekend.
Acrylic paint, glue, and twine for hanging are usually enough; most of the time, that is already in the junk drawer.
The paper snowflakes suit a movie night because the cutting takes time but the assembly is just folding and glue.
What handmade Christmas items sell best?
Personalized pieces move fastest, especially vinyl-letter glitter balls with a baby’s name or an initial ornament wearing a tiny Santa hat. The labor shows in a way store-bought cannot match, and buyers pay for that specificity.
A set of mod-painted wood balls or a salt-dough handprint with the year and name also outperforms generic designs because they mark a specific person and date.
What is the most sought after Christmas ornament?
The ornament that marks a first, something that records a specific December rather than decorating one.
The ornaments people keep asking about are the ones that mark something: a salt-dough handprint with a name and year, vinyl letters for a new baby, an initial for a first home.
They become keepsakes because the moment they capture cannot be replicated.