These Christmas tree DIYs range from scrap wood to a soda bottle you already finished, and the one that fits your weekend depends on whether you own a saw, a pair of scissors, or just a glue bottle.
[link-whisper-related-posts]1. Wood Christmas Trees
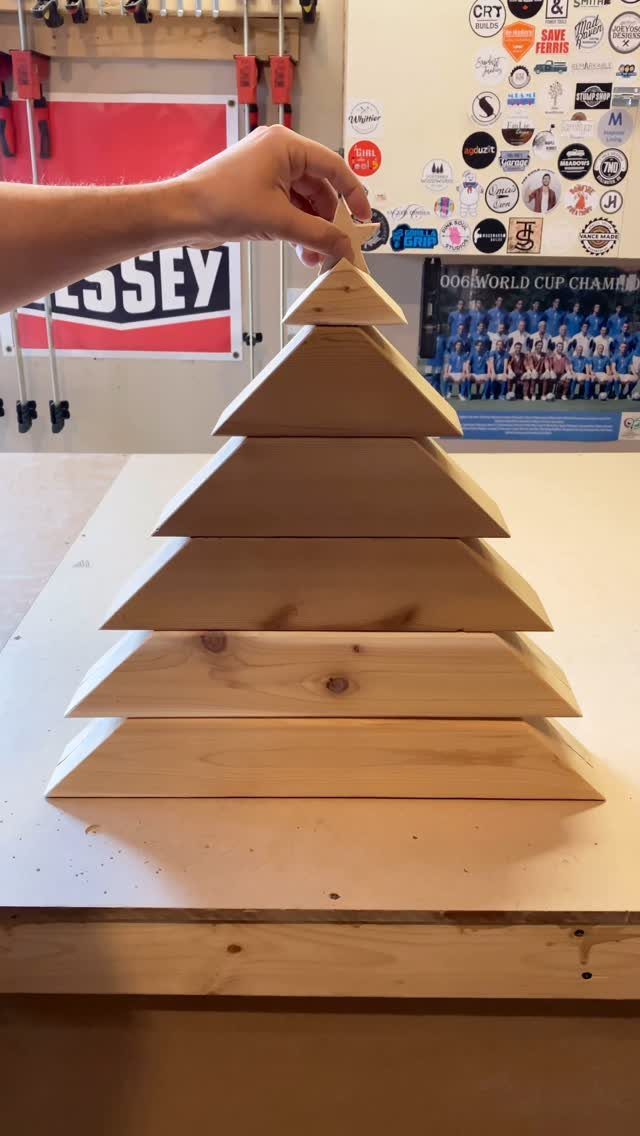
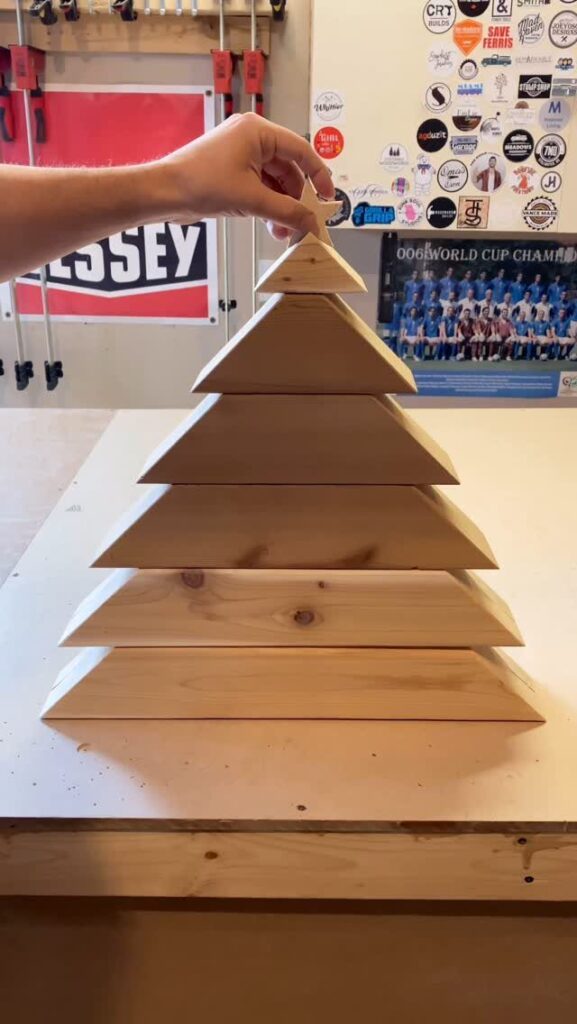
A tiered wooden Christmas tree built from 1×2 pine boards sits flat on a shelf or porch and takes paint however you want it.
The boards get cut to stacked lengths, glued together, and finished with a wooden star on top. I like that this one stores flat after January and comes back out with a different color scheme whenever you want.
Pine boards and a tube of wood glue do not cost much, and the cutting list is simple enough that one afternoon gets you to painting.
String lights around it at night and it reads as yard art without the yard art price.

Christmas Tiered Tray Decoration: bring home the Christmas atmosphere with the pack of 22 exquisite and lovely Christmas decorations for home; With a variety of rustic designs and patterns including gingerbread man, Christmas elk, Christmas tree, We also arranged glue points, you can stick them on yourself, Please note that the tray is not included in the package
2. Paper Christmas Tree

Paper Christmas trees fold up from a downloaded template, which means the only tool you need is scissors that can handle a straight edge.
The finished tree stands on its own as a tabletop piece, and the hollow center takes small ornaments or a battery light if you want to push it further.
Card stock in green is the obvious choice, but the same folds in white or kraft paper read more winter than holiday if you need something past December.
Glitter is optional and, in my view, best kept off the inside folds where it sheds onto the table.
Printing the templates takes longer than the assembly, and the whole project asks for little more than paper, tape, and a pair of scissors.
3. Plastic Bottle Christmas Tree
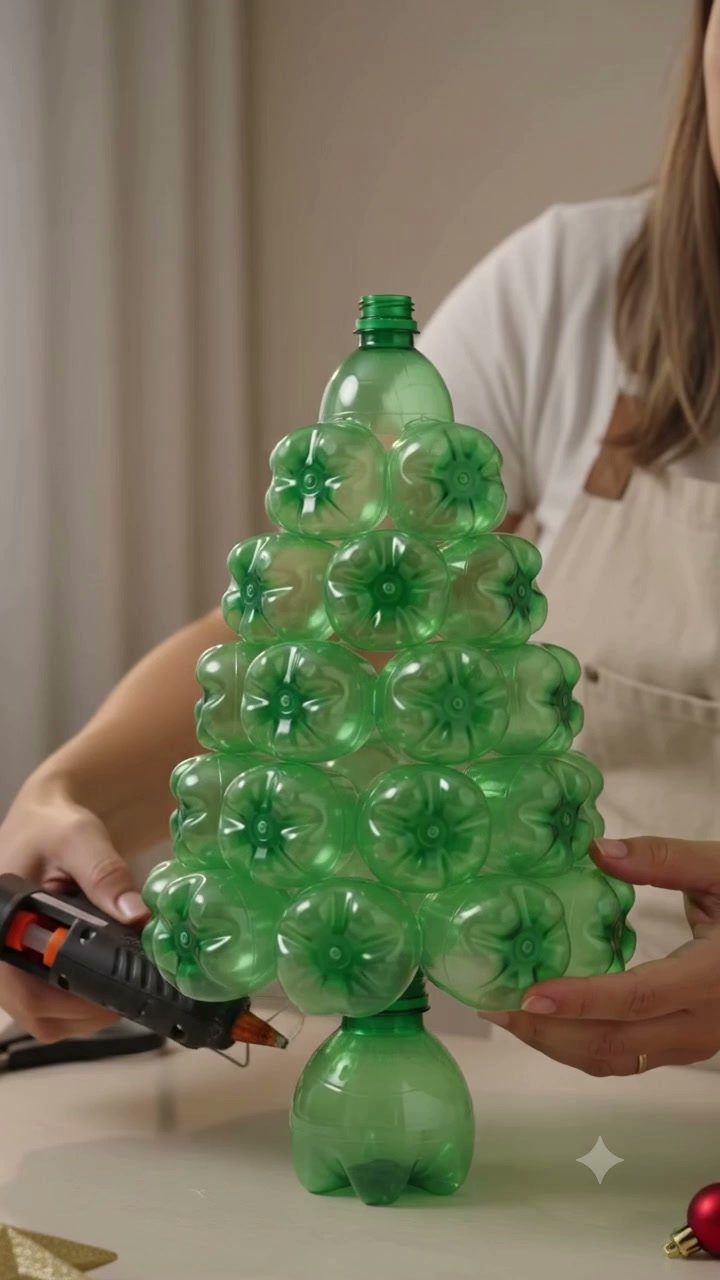
A plastic bottle Christmas tree saves the bottoms and tops of green soda bottles, layered and glued into a cone.
What you need to decide before starting is whether your bottles read green enough once the labels are off; clear bottles need paint inside or they look like recycling, not decoration.
This version stays small, tabletop size, so it suits a desk or a child’s room where a full tree will not fit.
Budget-friendly Projects
Scrap wood that would otherwise sit in a corner becomes the whole structure for the tiered pine tree. Paper costs less than a coffee and folds into something that reads intentional on a shelf.
Even the plastic bottle version asks only for what you already drank from, plus glue. None of these projects require a trip to a specialty store or a cart full of new lumber.
Customizable Designs
The wooden tree takes paint in any color scheme you want, and a different coat next year if you change your mind.
The template bundle offers multiple sizes if you want to build a small forest rather than a single piece.
Simple Assembly
A tiered wooden tree needs only a saw for the cutting list and wood glue for the joints.
Paper trees ask for scissors that handle a straight edge and tape. The bottle version needs glue and patience layering pieces into a cone.
No project here calls for a drill, a nail gun, or a lesson in joinery. The wood one eats up an afternoon with paint and dry time; the paper one folds faster than my printer can spit out the template.
Time-efficient Crafts
Paper assembly moves faster than the printer.
The bottle tree stays small by design, so there is no large structure to wrestle with or store. All three fit between other weekend obligations rather than replacing them.