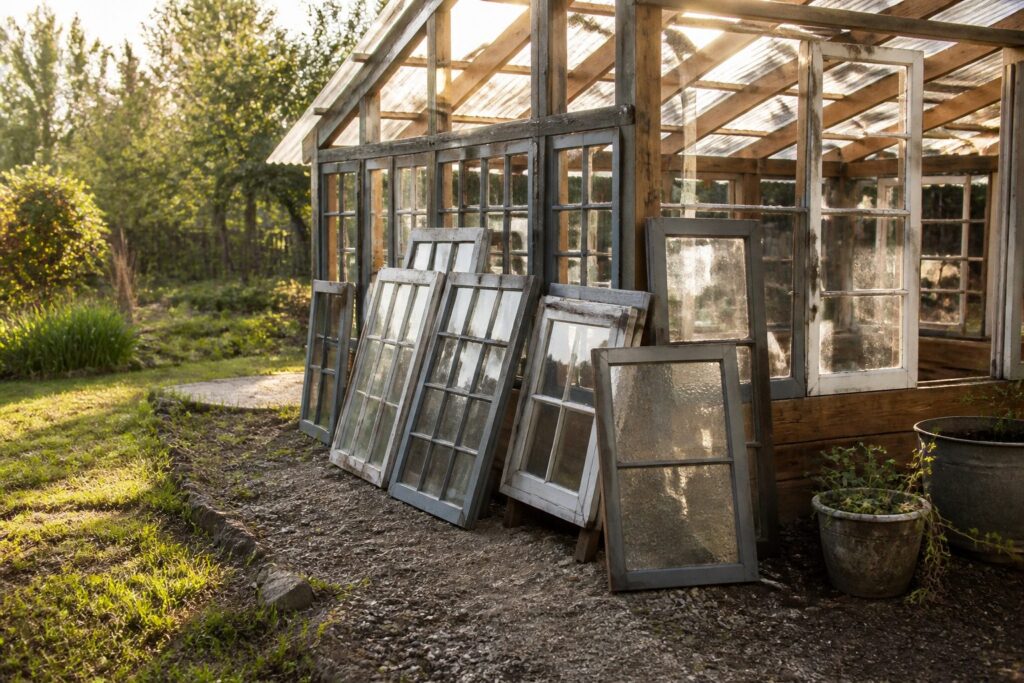
A finished glass greenhouse from old windows takes a weekend of framing and roughly $85 to $130 in lumber, fasteners and roofing if you already scavenged the glass free.
Most builds collapse their budget on the foundation or the roof because those are the two stages you cannot scavenge and cannot skip.
The real cost only surfaces once you count treated 2×6 ground timbers, carriage bolts, and corrugated polycarbonate panels cut to span the rafters, which is why collected window piles sit in driveways for years while people stall at the price of what goes underneath them.
[link-whisper-related-posts]1. Gather Materials
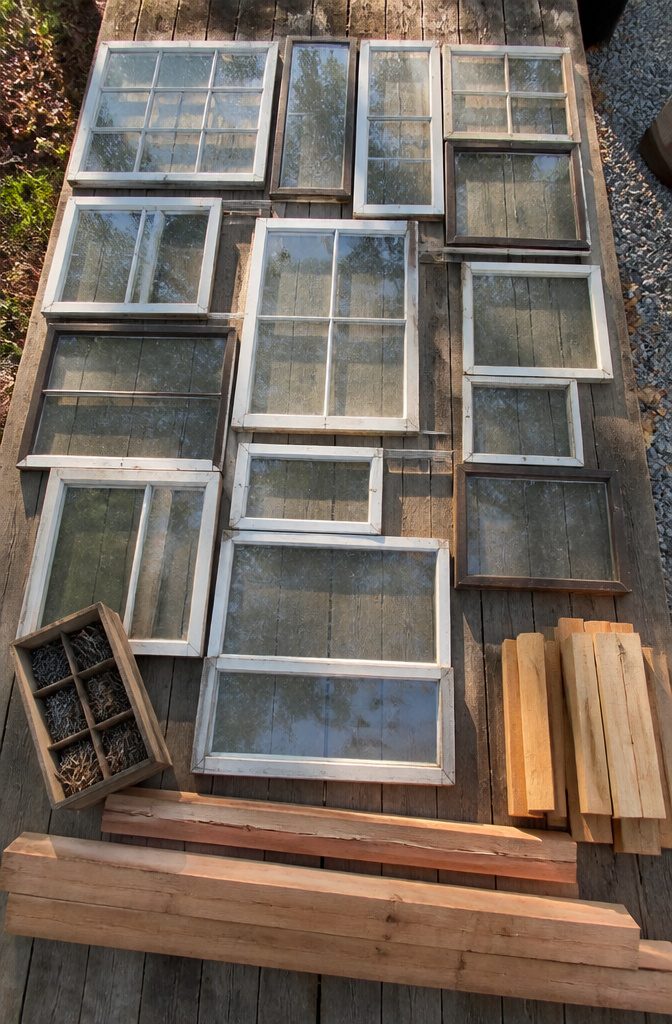
Old windows drive the whole project, so the hunt starts before anything else gets bought.
Most salvaged units run about 35 by 42 inches, though scavenged panes rarely match that exactly so plan for real sizes. That mismatch shapes every later decision, which is why collecting them first matters.
Once the glass is stacked and counted, lumber fills the gaps. For the frame, roughly 25 pieces of 2x4x8′ handles the walls and roof structure, plus a few spare 8-footers to brace everything square while you work.
The foundation sits on 4 pieces of 2x6x6′, and treated lumber is worth the extra cost here since ground contact rots standard boards in a season or two.
Untreated 2x4s can work if you paint or stain them thoroughly, but treated skips that step.
Fasteners pile up fast: about 5 pounds of 8D 2½-inch galvanized nails and 3 pounds of 2½-inch exterior screws. Roofing needs clear polycarbonate panels, usually 3 to 4 of the 12-foot lengths, plus a pound of roofing screws.
Spray foam seals the odd gaps where window frames do not quite meet, and hinges, a latch, and an anti-sag kit finish the door.
Gravel or sand beds the cinder block foundation, with stone or more gravel for the interior floor.

Effortless affixing: treated lumber retains its nail and screw grip, making each board easy to secure with common fixings for robust, lasting exterior and interior...
2. Prepare Windows
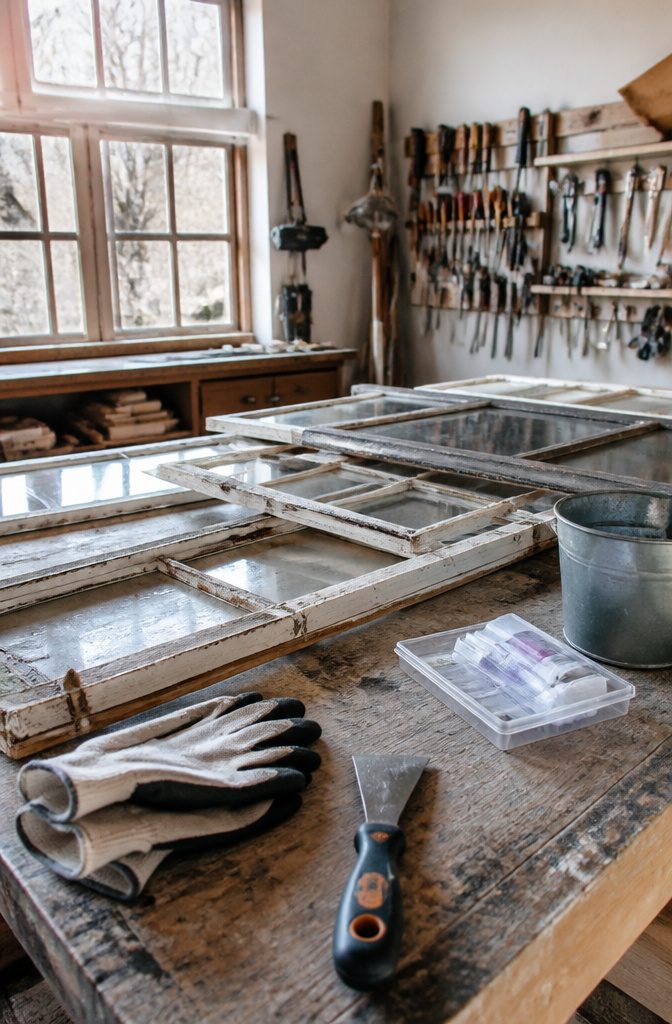
Old windows look promising in a pile, but the real work starts once you get them home.
Paint that predates the mid-1970s can carry lead, and the only way to know is testing before you invest hours in glass that might not be worth saving.
A lead test swab kit runs the color change in about thirty seconds: yellow means clean, red means stop and plan for hazmat handling.
Lead-positive paint means stripping, not sanding. Scraping sends chips airborne; a chemical stripper like Citri-Strip, sealed under plastic wrap to keep it wet, lifts multiple layers without the dust.
Gloves and a respirator are non-negotiable here, especially with kids around. Once stripped, pull the old ropes and metal hardware, keep a bucket for the sharp stuff, and measure every window for width and height.
Label each one with a Sharpie on the glass, grouping matching sizes together so you know what you actually have before the frame design starts.

For heavy-duty general construction and framing

For light-duty general construction, carpentry, and box making

Perfect for attaching trim, window frames and door casing.
3. Design the Greenhouse
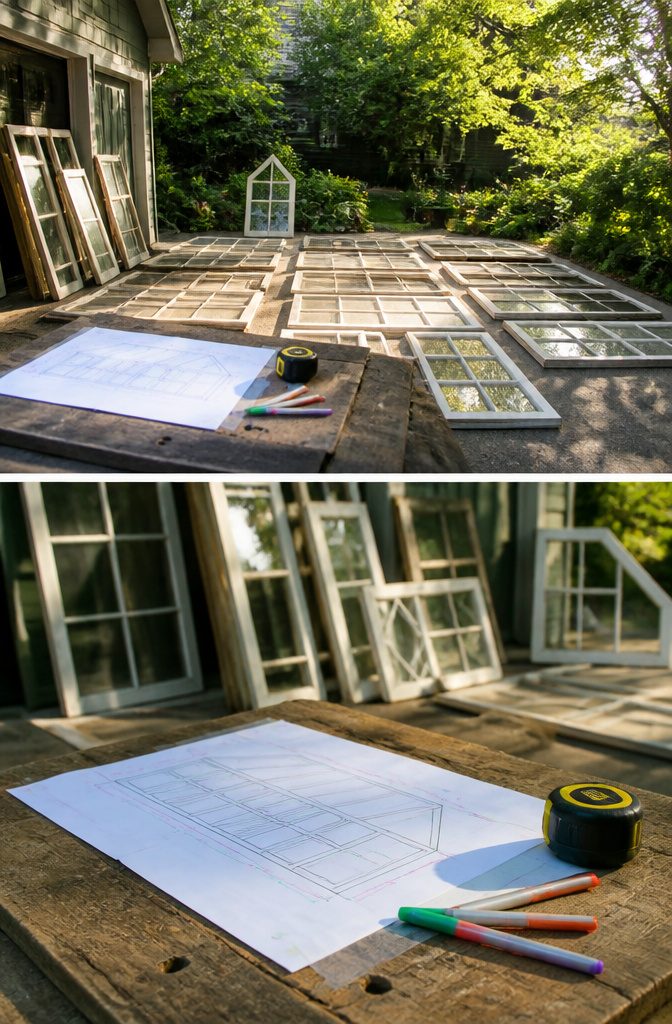
The windows themselves are the blueprint, not the other way around. I laid every sash out on the driveway before touching a pencil, measured each one with a tape measure, and only then started sketching.
A 32-inch-wide window next to a 28-inch-wide one means that wall section will need a 4-inch filler strip or a creative shift in layout, and those decisions ripple outward to every other wall.
Check your local building codes before you settle on a size. One builder found that keeping the footprint to 5 by 5 feet put the structure in "shed" territory, which skipped the permit process entirely in their area.
Urban readers may not have that option; code enforcement offices in denser locations often have stricter size limits or setback rules.
Mismatched heights dictate where doors and vents can live.
Tall windows want to be the long walls; short ones stack well as transoms or end up as the door itself. Thin windows turned on their side made a striking door in one build, though the weight was punishing.
The roof style shifts too: a hip roof with its angled cuts demands precision that mismatched salvaged frames rarely cooperate with, which is why that same builder abandoned it for a simpler lean-to.

Superior Corrosion Resistance: Ruspert coating, ideal for pressure-treated lumber, matches hot-dip galvanization (ASTM A153, Class D) for excellent rust protection in outdoor conditions.

SUPERIOR ANTI-RUST COATING: Tan coated exterior wood screws 2-1/2 inch through 1500 hours salt spray test against erosion and rust. These deck screws for exterior can be exposed to the sun, humidity, rain and snow condition for a long time

Premium Quality: Crafted from durable steel and coated with a Brown exterior epoxy finish for superior rust resistance.
4. Build the Foundation
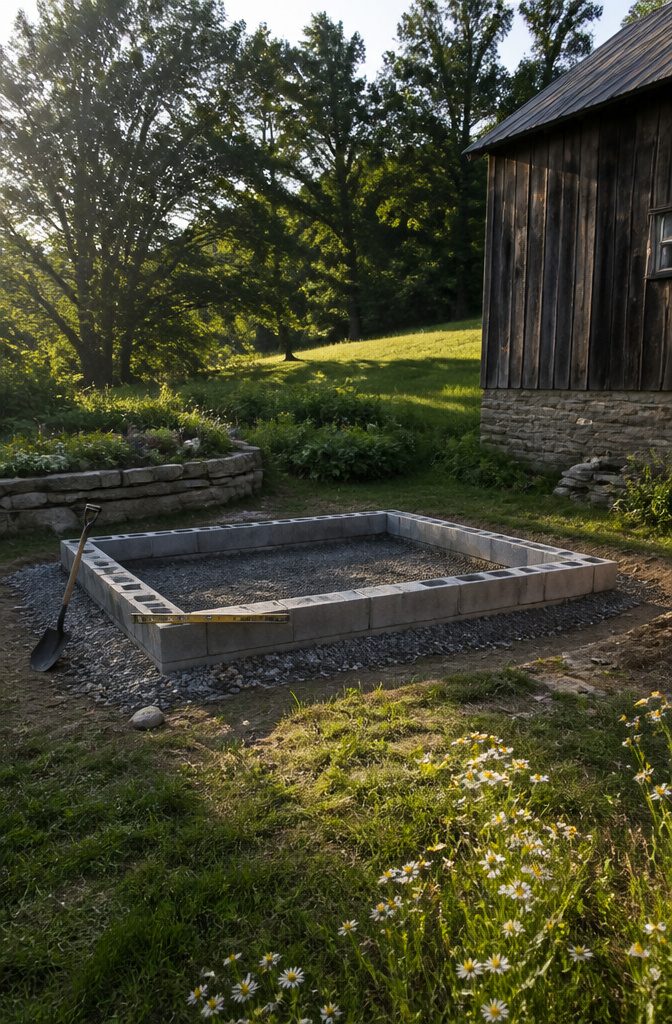
A greenhouse foundation has to be square and level, or every window frame after it fights you.
I built mine on standard 6x8x16 inch cinder blocks, roughly 32 for a small structure, laid dry on a bed of gravel and sand.
The gravel lets water drain instead of pooling, and if a block settles over winter you can pry it up and shim it level again.
Some builders dig four-foot footing holes below the frost line, stack cinder blocks inside, and fill around them with gravel rather than pouring concrete.
The gravel-filled block is lighter to move and easier to adjust if the ground shifts, which matters for a freestanding greenhouse that is not tied to your house.
I have seen poured concrete footings crack and tilt anyway; at least this way you can fix it with a shovel and a level.
Check your local codes before you commit. Four-foot depth is the rule in certain climates, but not everywhere, and some inspectors want to see concrete.
Treated 2×6 lumber is the alternative if blocks feel like overkill, though I would still set it on gravel to keep the wood dry.

80% Light Transmission: With 80% transparency, these roof panels allow ample light while blocking 98% of UV-rays, preventing overheating and supporting stable, plant-friendly temperatures year-round.

Easy to Splice: The polycarbonate sheet is made of 12 pieces 39.37in x 36.6in spliced together to form 3.2ft x 32.8ft.The corrugated design allows for seamless splicing of two panels together without the use of any tools. Unpacking may have white resin powder, just take a damp cloth and wipe it off for normal use

80% Light Transmission: With 80% transparency, these roof panels allow ample light while blocking 98% of UV-rays, preventing overheating and supporting stable, plant-friendly temperatures year-round.
5. Frame the Walls
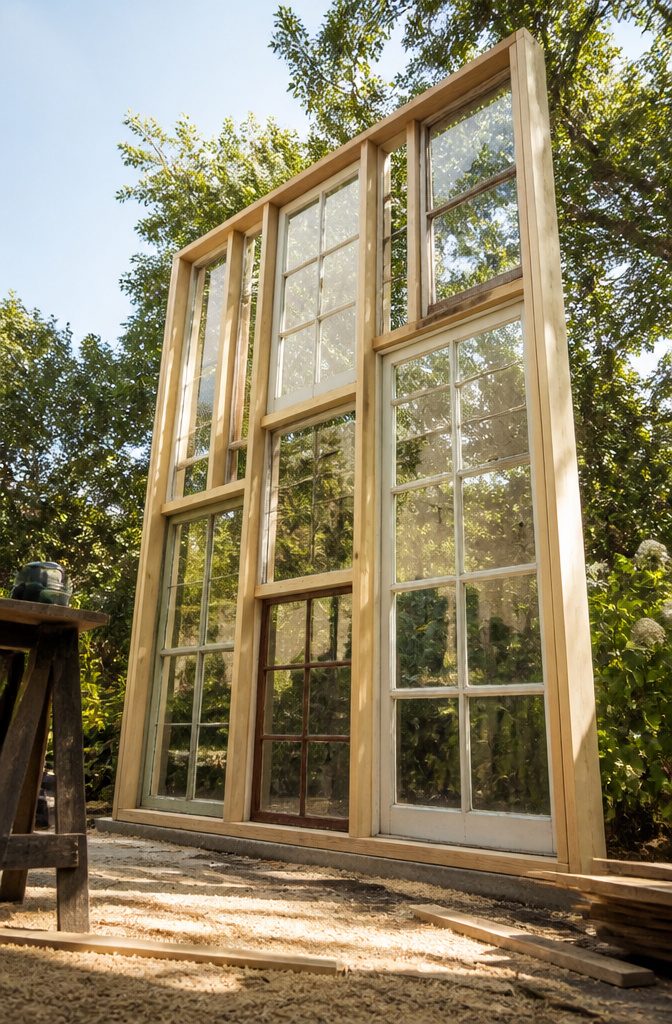
Wall framing starts with the windows you actually have, not the ones you wish you’d found. I laid every sash out on the driveway first and measured each opening individually.
A 28-inch window from a 1950s bungalow and a 32-inch window from a ranch teardown do not play nice on a standard grid, so the 2×4 studs get cut to fit the glass, not the other way around.
I aimed for roughly seven feet of finished wall height, but the top and bottom plates shifted by an inch or two per section to accommodate whatever frames showed up on Craigslist that month.
Corner bracing went in below the window line inside and across the top outside; those upper braces came off once the walls were tied together, while the lower ones stayed put to stiffen the whole frame against wind.
Before anything got nailed, I checked every rough opening with the actual window in hand. Hinge placement for any venting sashes got verified here too, since the frame lumber blocks where hardware needs to sit.

60 Counts Value Pack: Each box contains 60 Pcs of the Lead Test Kit, providing a cost-effective and valuable solution. Shelf life is 2 years.

2-in-1 LEAD DETECTION: Safe Home provides the only LEAD COMBO-KIT on the market which includes 10 DIY surface swabs that issue results in 30-seconds to a detection of 5 ppm AND a sample-submission kit for optional in-depth Lead testing at our EPA-certified lab to a detection of 0.006 ppm. All of this…in ONE KIT!

ALL-IN-ONE SOLUTION: This lead testing kit is a completely ready-to-use lead tester, pre-loaded with all the ingredients. There’s no need for additional water, vinegar, or chemicals. Simply cut the tip of the test swab and you’re ready to start testing immediately
6. Raise the Walls
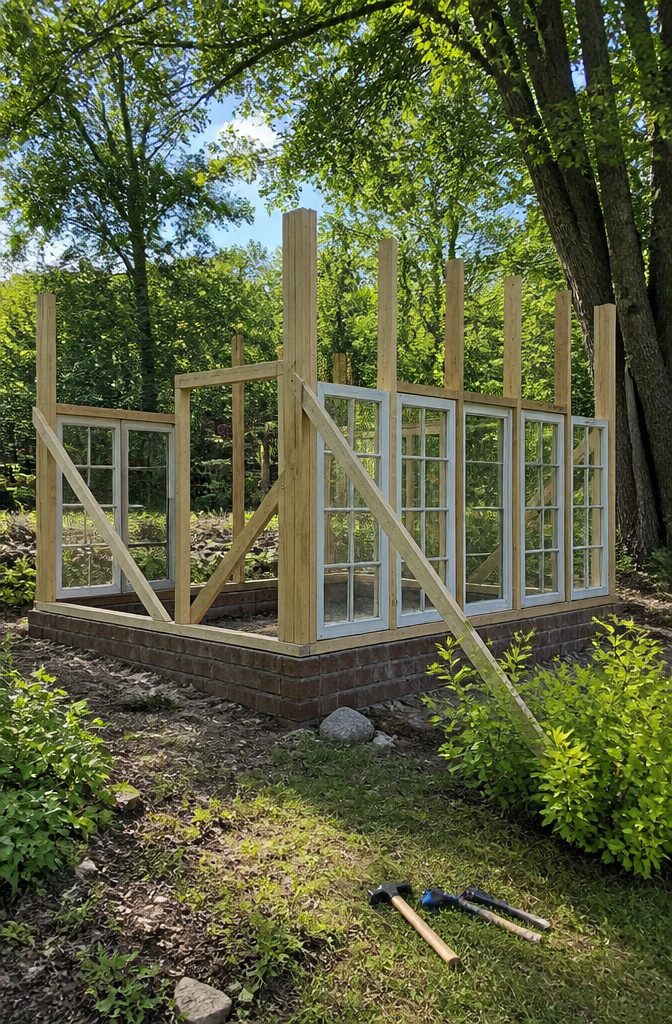
The first wall frame went up easy enough with a friend on the other end, but the moment I let go it wanted to lean like a drunk at closing time.
Recycled window frames are heavier than fresh lumber, and the glass still sitting in them throws the center of gravity somewhere you don’t expect.
I drilled 1 1/2-inch holes in the bottom of each frame so they’d drop over the bolts sticking up from the footer, which helped with placement, but placement and standing straight are two different jobs.
A temporary brace is the only thing that saves this stage. I partially nailed one end of a 2×4 to the top corner of the frame, pivoted it into the dirt, and adjusted until the wall read level.
The wobble stopped instantly. That solid feeling is worth the ten minutes, because trying to hold a wall with one hand while fastening with the other is how frames get forced out of square.
I ran braces across the tops too, corner to corner, before any roof framing went on.
They let me shift and settle each wall until the window openings actually lined up with the sashes I’d measured back in the prep stage.
One frame sat a half-inch proud of where it needed to be; without that top bracing I would have nailed it wrong and found out when the glass wouldn’t fit.
Once everything checked, screws went into the footer and corners, and the temporary braces came off.
7. Add the Roof
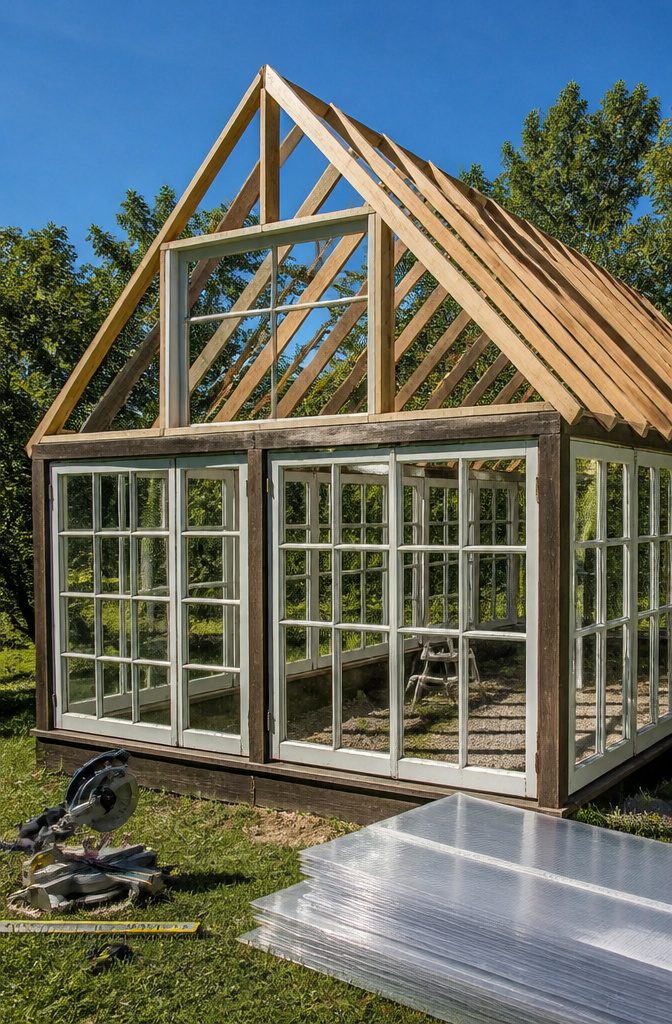
The roof frame starts as a simple box for the front, with three evenly spaced supports running across.
From there, the slope to the back wall sets everything: pitch equals height divided by width, and that ratio converted to degrees is what your miter saw needs for the notch cuts.
Rafters at 8 feet left me a small overhang front and back, which is worth having for runoff. Hurricane ties anchor them to the frame, and bracing across the tops locks the structure before any roofing goes on.
Clear roofing is the move here, not the corrugated metal you might use on a shed. Every opaque strip is light your plants lose, and a glass-walled greenhouse only works if you let the light through.
I used 12-foot corrugated panels, cut in half to match a 6-foot rafter span, run with the ribs overlapping by one corrugation and fastened with 1-inch hex-head screws.
The rubber pads under those heads seal without cracking the plastic. A ridge cap finishes the peak.
One hard-learned detail: do not lay those panels on grass in sun, even for a minute. The focused heat underneath will scorch a lawn patch dead fast.

Maze Nails 8D 2-1/2 in. Siding Hot-Dipped Galvanized Stainless Steel Nail Flat 5 lb.

Seeking framing nails that combine strength, compatibility, and long-lasting performance for your construction projects? Our 21 Degree Framing Nails deliver professional-grade reliability and efficiency!

DEPENDABLE FRAMING HOLD: A #11.5 box-nail shank holds framing, sheathing, and trim securely while reducing splitting in thinner stock, giving a clean, reliable connection for exterior carpentry and construction. That delivers a reliable hold you ca
8. Install Windows
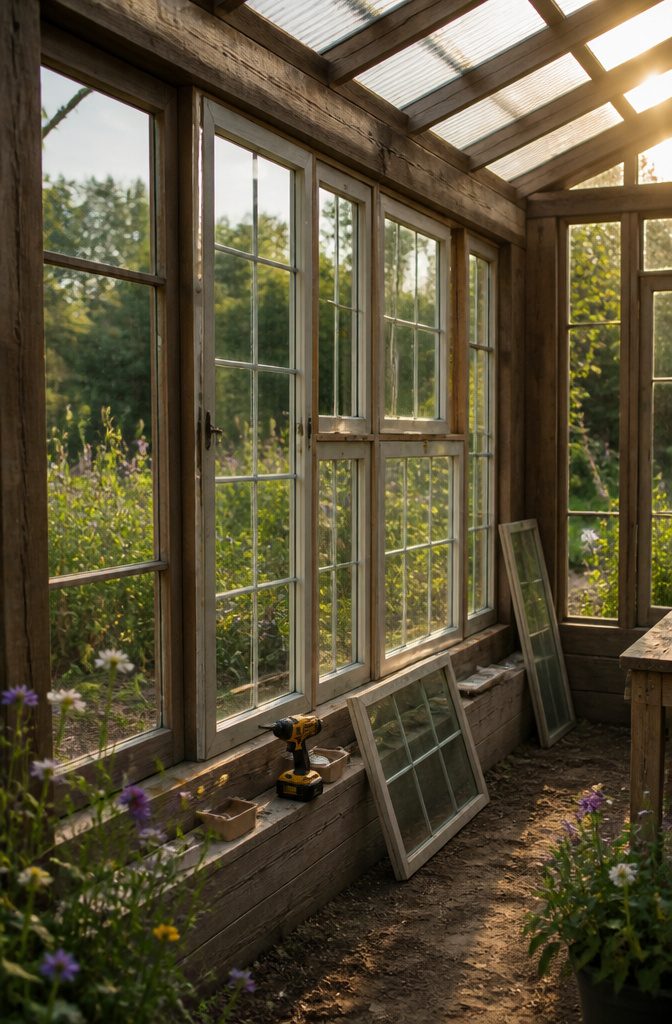
Windows go in two ways: fixed shut or hinged at the top to swing open.
At least two need to open, because a glass greenhouse turns into a solar oven the moment the sun hits it hard. Fixed panes trap heat; operable ones let you bleed it off before the tomatoes cook.
I held each window in place with screws angled into the frame, two at the bottom and two at the top, inside and out.
That wedged the glass firm without drilling through it. For the ones that would open, I attached the bottom half of a hinge to the top of the window, pre-drilling so the old wood wouldn’t split.
A second pair of hands helps here; working alone, a pry-bar raised and held the window while I drilled the frame side. A thin wood strip on the inside gives the hinged window something to rest against when closed.
Fixed windows need their own strips around the inside of the frame to lock them in place.
The gap you are filling depends on how precisely you measured earlier. A single screw through a little wood strip makes a latch to keep the hinged ones shut against wind.
Seal gaps with something that blocks air without trapping water.
Caulk along the outside edge where glass meets frame, but leave the bottom of fixed windows unsealed or angle the bead so condensation runs out. Water that cannot escape rots the frame from inside.

Corrosion Protection For Outdoor Use: Galvanized finish for excellent rust resistance, exceeds 250-hour salt spray test, dependable fastening for decks, fences, and exterior builds

Built for Outdoor Excellence: You will get 1lb box (approx. 66pcs screws) #10 x 2-1/2" Bronze deck wood screws with T25 star bit,Tested to withstand over 2000 hours of salt spray exposure,feature a specialized external Bronze corrosion-resistant coating,withstand harsh weather conditions without breaking down.

Galvanized Deck Screws provide excellent corrosion resistance
9. Finish the Interior
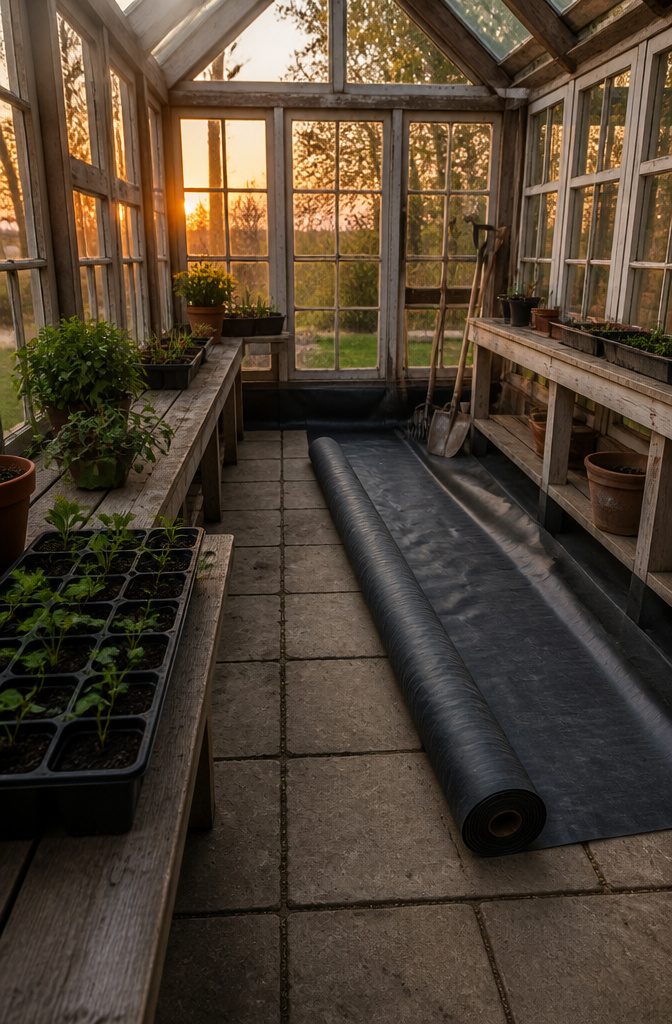
The frame stops being a shell and starts being a greenhouse once the inside works.
Flooring comes first. Old paving slabs with gravel between them make a solid surface that drains and stays level through wet seasons; donated pavers or slate from a friend’s renovation work just as well if you come across them.
A layer of 0.5 mm pond liner over the base keeps moisture from rotting the timbers underneath, fixed behind the squared timbers with a tacker and trimmed with a craft knife.
Leave a cutout for a drain, and fit a universal sink valve to let water out.
Shelves turn wall space into growing space. I keep them shallow, about the depth of a windowsill, so every pot stays reachable from one side without climbing in.
Old scaffolding boards or cut-down shelving units do the job; two squared timbers at 20 x 25 mm screwed to the frame carry each level.
A work surface at waist height, even just a section of old potting bench, saves your back during transplanting.
The door is where a small build lives or dies. Hang it to open outward; an inward swing steals the few square feet you have.
Barn hinges work in a pinch, though a mortise-style hinge holds up better to the weight, and an anti-sag cable keeps the frame from drooping over time. A scrap-wood latch on a single screw is enough to keep it closed.

10 PANELS, 105 SQ FT: Ten clear polycarbonate trapezoid corrugated sheets, each 72" L x 21" W (10.5 sq ft per panel before overlap), enough for a small patio cover, greenhouse roof or under-deck drip barrier. Fasteners sold separately.

Sturdy and Thickened: you will receive 12 pieces polycarbonate greenhouse panels, the size is approx. 2 x 8 ft, the thickness of these polycarbonate sheets is about 0.16 inch, which is not easy to break

80% Light Transmission: With 80% transparency, these roof panels allow ample light while blocking 98% of UV-rays, preventing overheating and supporting stable, plant-friendly temperatures year-round.
10. Weatherproof
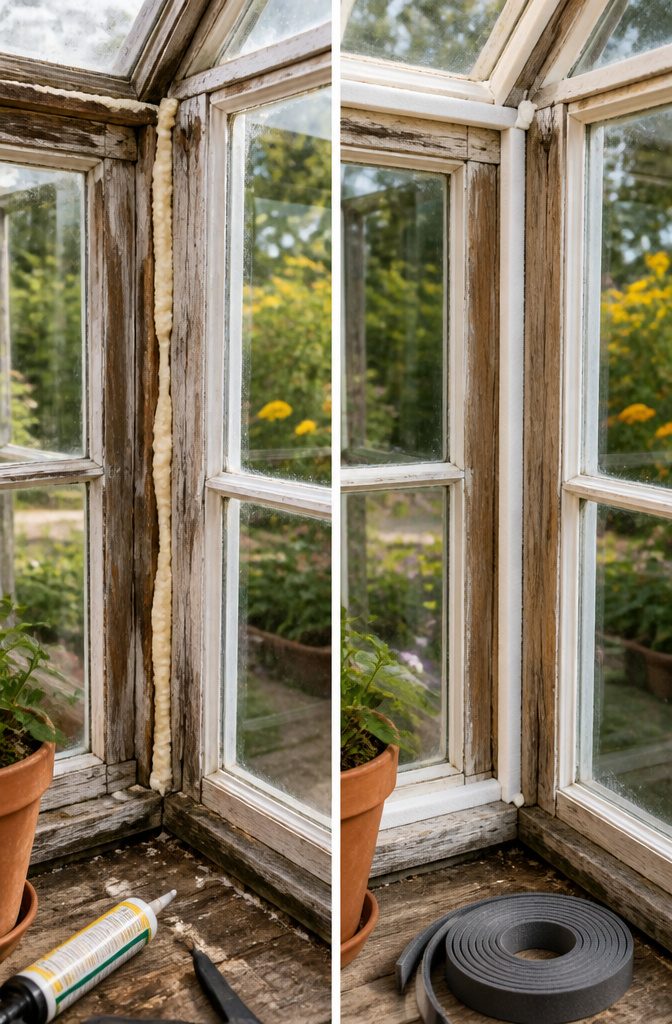
The gaps between mismatched window frames are where a greenhouse starts leaking heat and growing mold. I learned to start with the roofline, where the biggest openings let in rain and winter wind.
Foam stripping cut to fit works for narrow cracks; expanding spray foam fills the irregular voids where a tall window meets a shorter neighbor or where the frame butts against corrugated roofing.
Clearer patches, like leftover plexiglass, keep more light coming through than plywood strips, though plywood is what I had on hand one year and the tomatoes did not seem to mind.
Water follows the path of least resistance, so check the low corners where snow slides off and leaves pile up.
Those spots stay wet longest and the caulk there fails first. A draft on a still day means you missed a hole; a draft on a windy day means you probably missed several.
Automatic vent openers, the kind that expand with heat and need no wiring, belong on any hinged window you plan to use for summer cooling.
They cost more than a block of wood to prop the sash open, but they also close themselves when temperature drops and you are inside having dinner.

Upgraded Formulation for Optimal Lead Testing: NewPos lab specializes in researching the best lead test kit, starting with chemical formulations, we have global formulations of lead testing kits, and after 1,000 experiments, NewPos have upgraded our chemical formulations to make the test results more accurate

Accurate Results: Vinegar-activated lead test swabs provide reliable lead detection in 30 seconds; Color-changing tip compares to included chart for instant safety verification – trusted by parents and DIYers

Instant 30-Second Screening: Water-activated swab helps you check a suspicious spot quickly; readable color result in about 30 seconds
11. Monitor and Enjoy
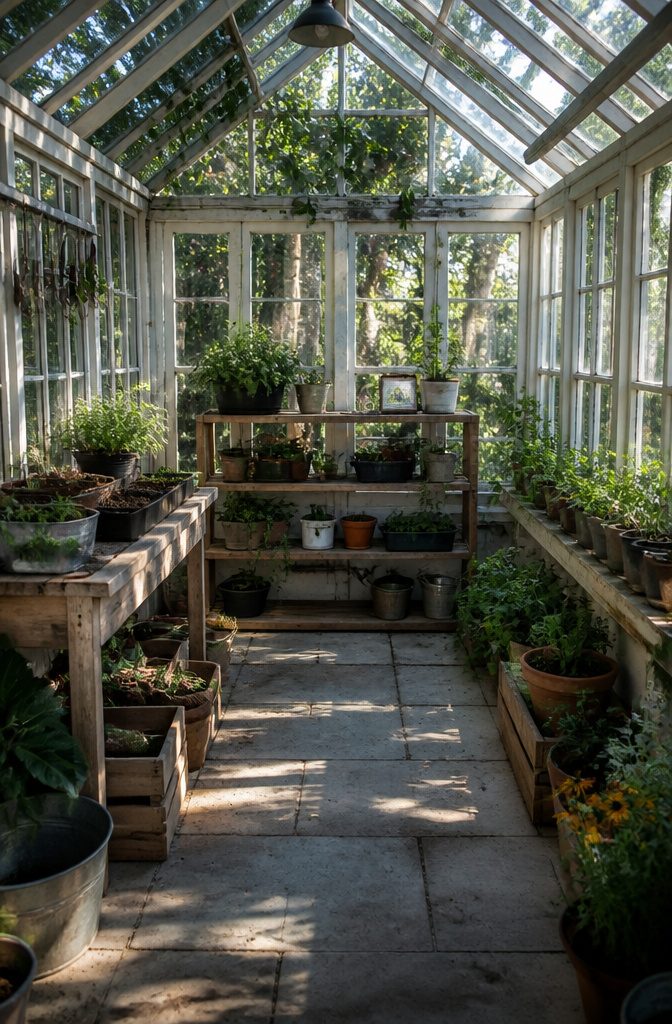
A cheap remote thermometer is the first thing worth buying after the build is done. The first season with my recycled window greenhouse was mostly about learning how far off my guesses were.
Seedlings wilt fast in a closed greenhouse on warm days, so open hinged vent windows before the forecast hits 65 degrees. Shade came later, after a July afternoon pushed the interior past 100 and I lost a flat of tomatoes.
Winter brought the opposite problem. The floor sat 10 degrees cooler than the middle of the space, a gap I only caught because I moved the thermometer around out of curiosity.
A small ceramic heater fixed the freeze risk once I closed the remaining gaps, but it took active monitoring. The recycled glass held heat better than I expected, yet the mismatched frames leaked more than uniform windows would have.
Manual venting is the trade for keeping the vintage look. Automatic louver openers exist at about $100 per vent plus another $100 for the hardware, and I still consider adding them.
For now, the routine of morning checks and afternoon shade adjustments is a manageable habit, and the greenhouse performs well enough to justify the saved cost.
What This Build Actually Costs
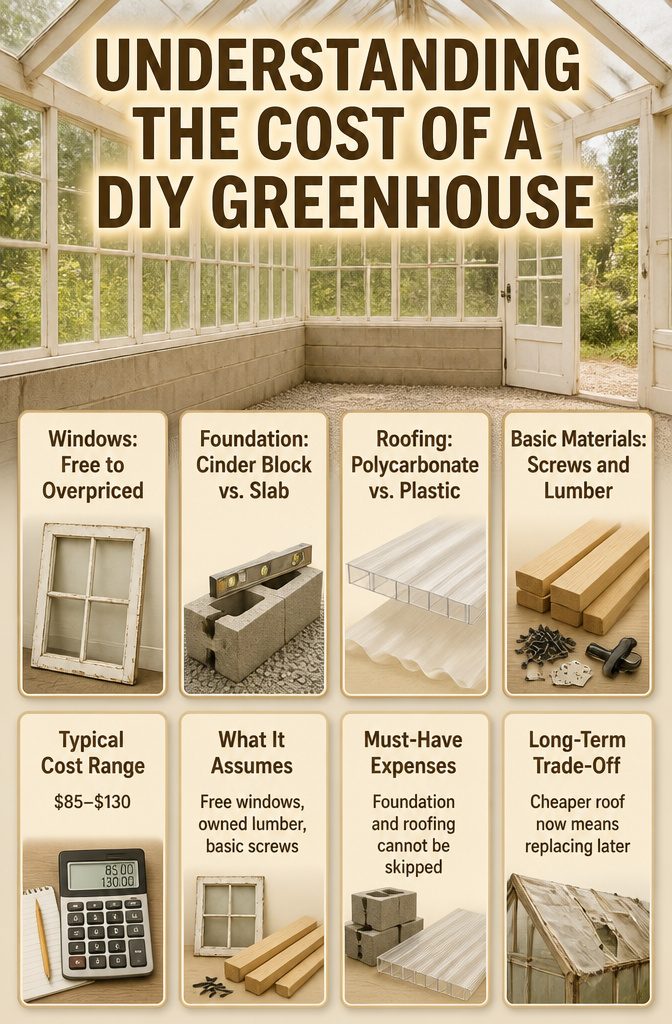
Most online builds for a DIY glass greenhouse from recycled windows land somewhere between $85 and $130, but that figure only covers what you would spend if you already owned the windows, had the tools, and lived near a supplier with cheap lumber.
The number gets passed around because it makes the project feel approachable, not because it reflects what most people actually pay.
In my own planning, the real cost hinges on three variables the headline figures never address.
First, the windows themselves: salvaged units from a demolition site or a neighbor’s remodel can run anywhere from free to more than new stock if the frames need reglazing or the glass is the old, wavy kind people now collect.
Second, the foundation. A cinder block base on compacted gravel costs less than a poured slab but still demands masonry mix, carriage bolts, and enough leveling time to burn a whole Saturday.
Third, the roof. Corrugated polycarbonate panels run more than greenhouse plastic sheeting but hold up to hail and tree branches; skipping them to save money means replacing the roof in two or three years.
The $85-$130 range typically assumes untreated lumber you already own paint for, free windows in usable condition, and no hardware beyond basic screws.
Treated 2x4s, hinges for vent windows, a door latch, and anti-sag cable for a homemade door all add up fast.
My advice is to price the foundation and roofing first, since those are the two line items you cannot scavenge and cannot skip.
Safety and Lead Paint
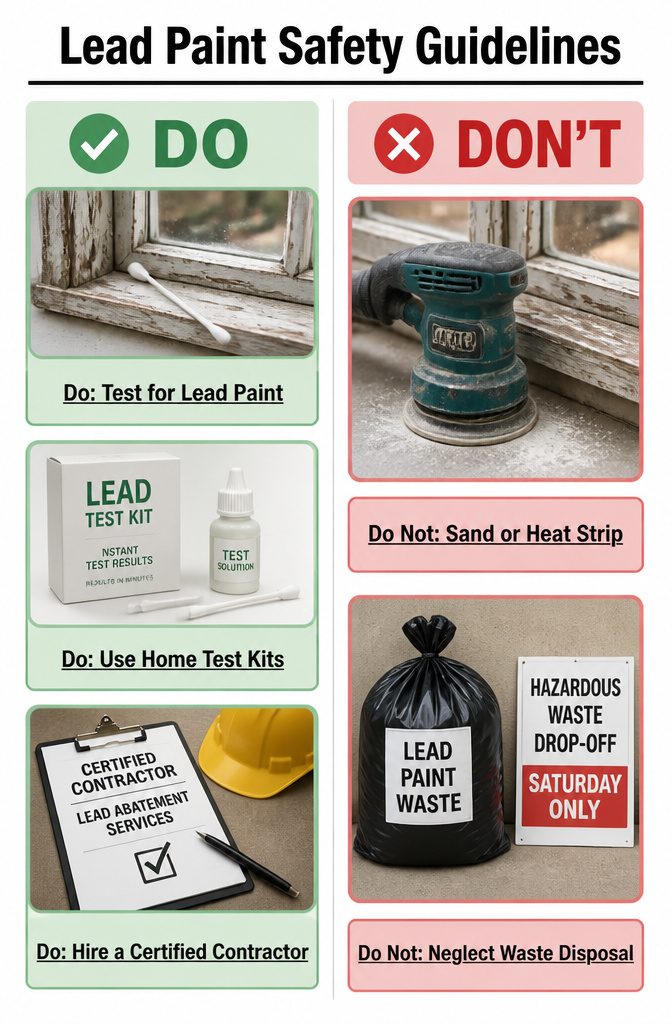
Old windows carry a hazard that most salvage yards won’t mention: lead paint. Anything built before 1978 is suspect, and the dust from sanding or cutting a single frame can contaminate your whole workspace.
Home test kits cost about $15 and give a result in minutes. Swab the sash, the sill, and any layer that chips easily.
A positive reading means you stop cutting immediately. Stripping with a heat gun is worse, not better; lead vaporizes at temperatures most guns reach on their lowest setting.
When the test turns red, a certified abatement contractor is the only safe path.
The EPA keeps a state-by-state finder online, and the inspection runs a few hundred dollars. That sounds steep until you price treating lead poisoning or replacing soil that dust settled into.
Disposal follows your county’s hazardous waste schedule. Most landfills ban painted architectural debris outright, and the fines for sneaking it in run higher than the proper drop-off fee.
Bag the waste wet, label it, and drive it on the appointed Saturday. The greenhouse can wait a weekend; your nervous system cannot.
Ventilation That Works
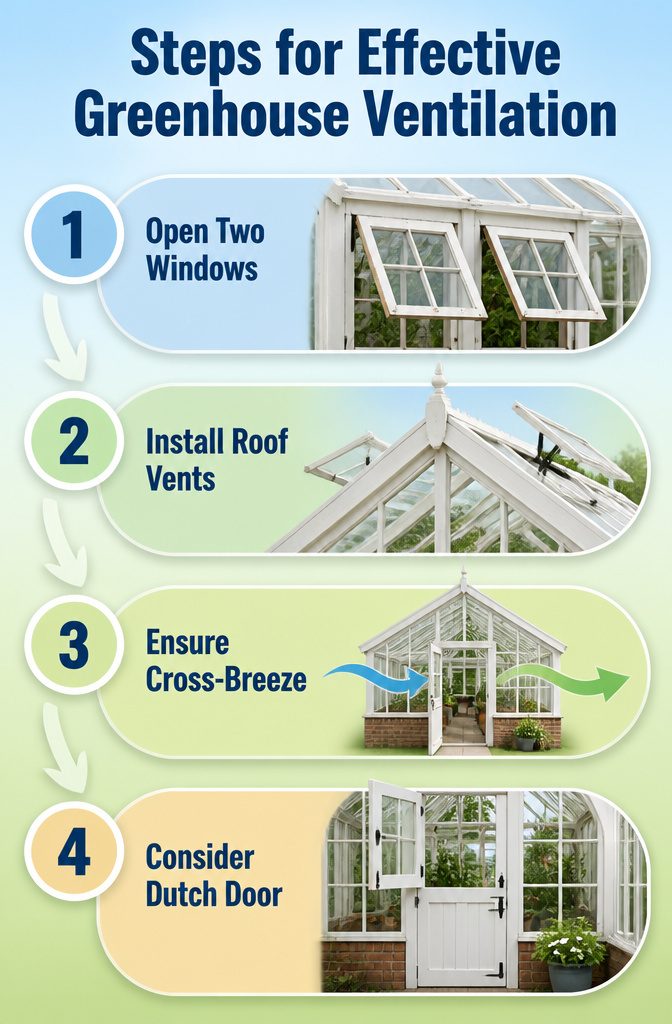
A greenhouse built from glass will overheat fast without a way for air to move through it.
The rule is at least two operable windows, positioned so a cross-breeze can run between them. On a still day, that pair of openings is the difference between seedlings that thrive and ones that cook.
Roof vents or a door that catches wind from the side turns that basic airflow into something reliable.
Hot air rises; a vent up top lets it escape while cooler air pulls in low. A Dutch door on the gable end works the same way, propped open to draw air straight through the length of the house.
I planned for two smaller top windows with hinges I could pop open by hand. Manual venting means babysitting the greenhouse on warm spring afternoons, but old window sashes keep the vintage look intact.
The alternative, automatic louver vents with openers, would have run about $400 for a pair. For now, the hands-on approach costs nearly nothing beyond the hardware already in the frame.
Designing Around Mismatched Windows
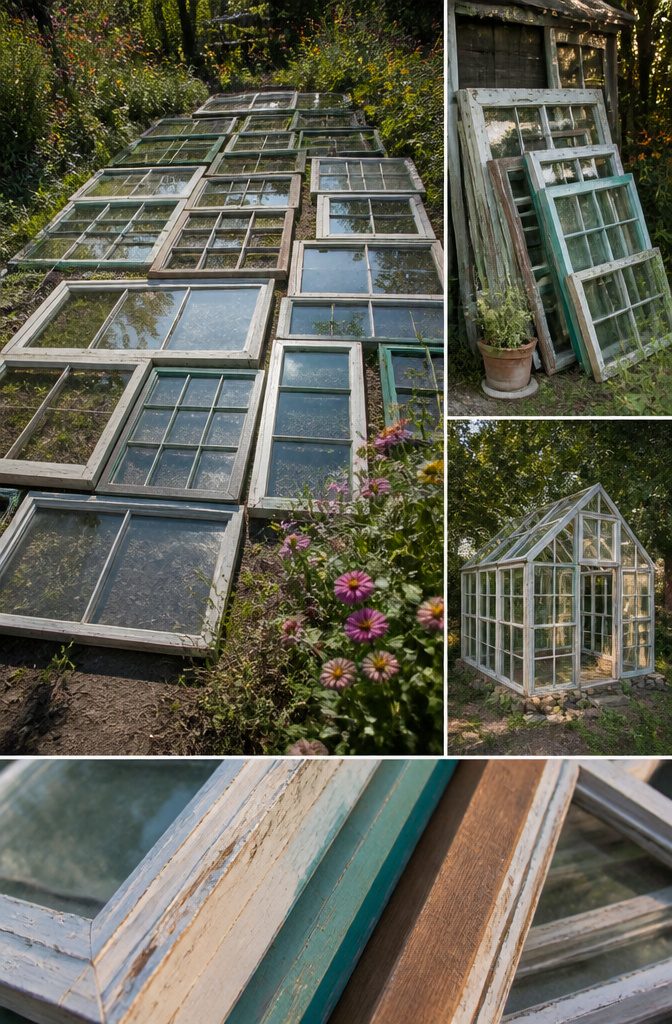
The first pile of windows on my driveway looked like a salvage yard had exploded.
Heights ranged from 24 inches to 54 inches, widths scattered even wider, and the frames carried three different colors of old paint. Grouping by similar heights turned out to be the move that saved the design.
I laid them out in rough rows and suddenly walls suggested themselves: the 36-inch-tall collection became the long south wall, the 42-inchers the north, with mismatched widths handled by varying the spacing between studs rather than forcing every opening identical.
Odd sizes found their purpose at the gable ends. A narrow 20-by-36 inch casement window, useless in a standard wall, sat perfectly in the peak where the rooflines met, its vertical proportions echoing the triangle’s shape.
Two square basement windows, too squat for normal framing, flanked it like bookends and let in cross-breeze above head height.
The asymmetry still worried me until the frame went up.
Then the rhythm of different proportions, all repeating the same grid pattern of old panes, looked intentional in a way matching windows never would. A greenhouse built from salvage is a collage, not a print.
Frequently Asked Questions
Can you use old windows to make a greenhouse?
Yes, old windows work well for building a greenhouse and are the main material in this project. The windows themselves become the blueprint for the frame, with 2×4 studs cut to fit their varying dimensions rather than forcing standard sizes.
Most salvaged units run about 35 by 42 inches, though scavenged panes rarely match that exactly so plan for real sizes.
What kind of windows can you use in a greenhouse?
Glass windows are preferred over polycarbonate panels for light transmission. Tempered glass is better than other types if you are buying new, but free salvaged windows are the most common starting point for this build.
Vinyl frames are the least expensive option if purchasing, though old wood-framed sashes with wavy glass are what most people actually scavenge.
How do you ensure proper airflow in a greenhouse?
Include at least two windows that open, positioned to create a cross-breeze between them. Hinged windows at the top of the frame let hot air escape while cooler air pulls in low.
Automatic vent openers that expand with heat and need no wiring are an option at about $100 per vent plus hardware, though manual venting with a block of wood costs nearly nothing.
How to make your own glass greenhouse?
Start by collecting old windows, then lay them out to design around their actual dimensions.
Build a level foundation of cinder blocks on gravel, frame walls with 2x4s cut to fit each window opening, brace them square, add a sloped roof with clear corrugated panels, install at least two operable windows for ventilation, and seal all gaps with caulk or spray foam.
What can I use instead of glass for a greenhouse?
Corrugated polycarbonate panels replace glass on the roof, where 12-foot lengths cut in half span typical rafters. Clear panels are the move over opaque options, since every non-transparent strip is light your plants lose.
For walls, polycarbonate is still an option if glass is unavailable, though it transmits less light than the old window panes this design centers on.